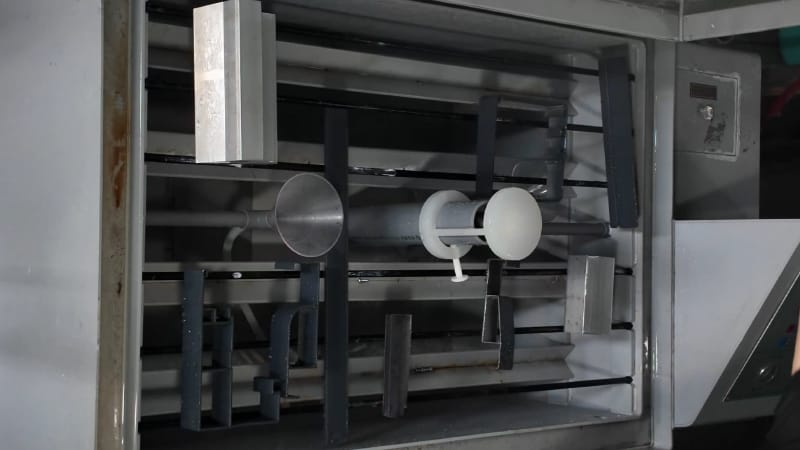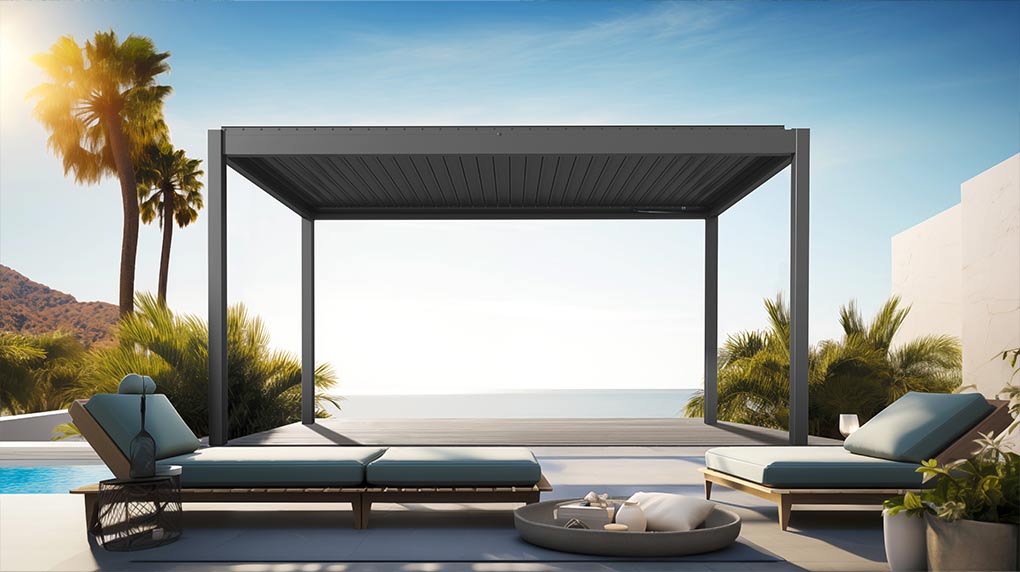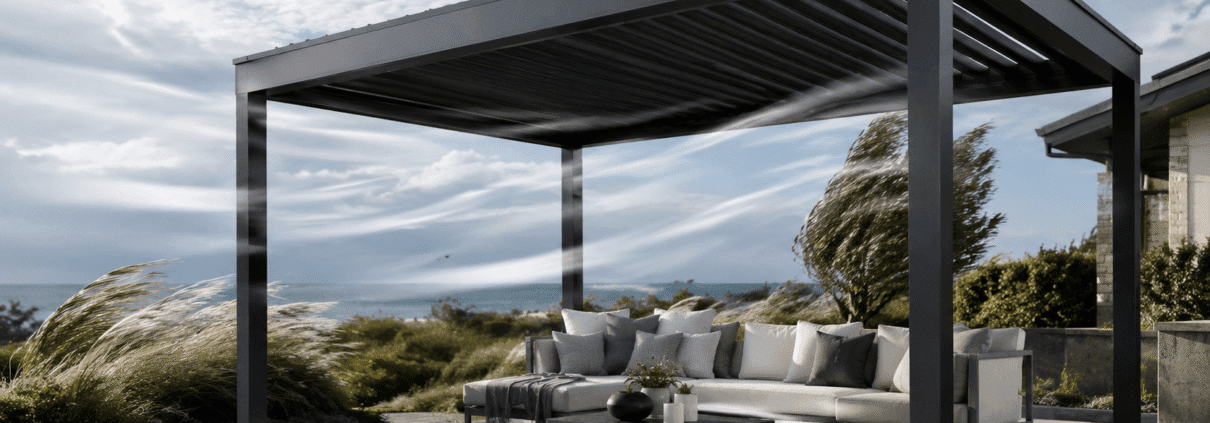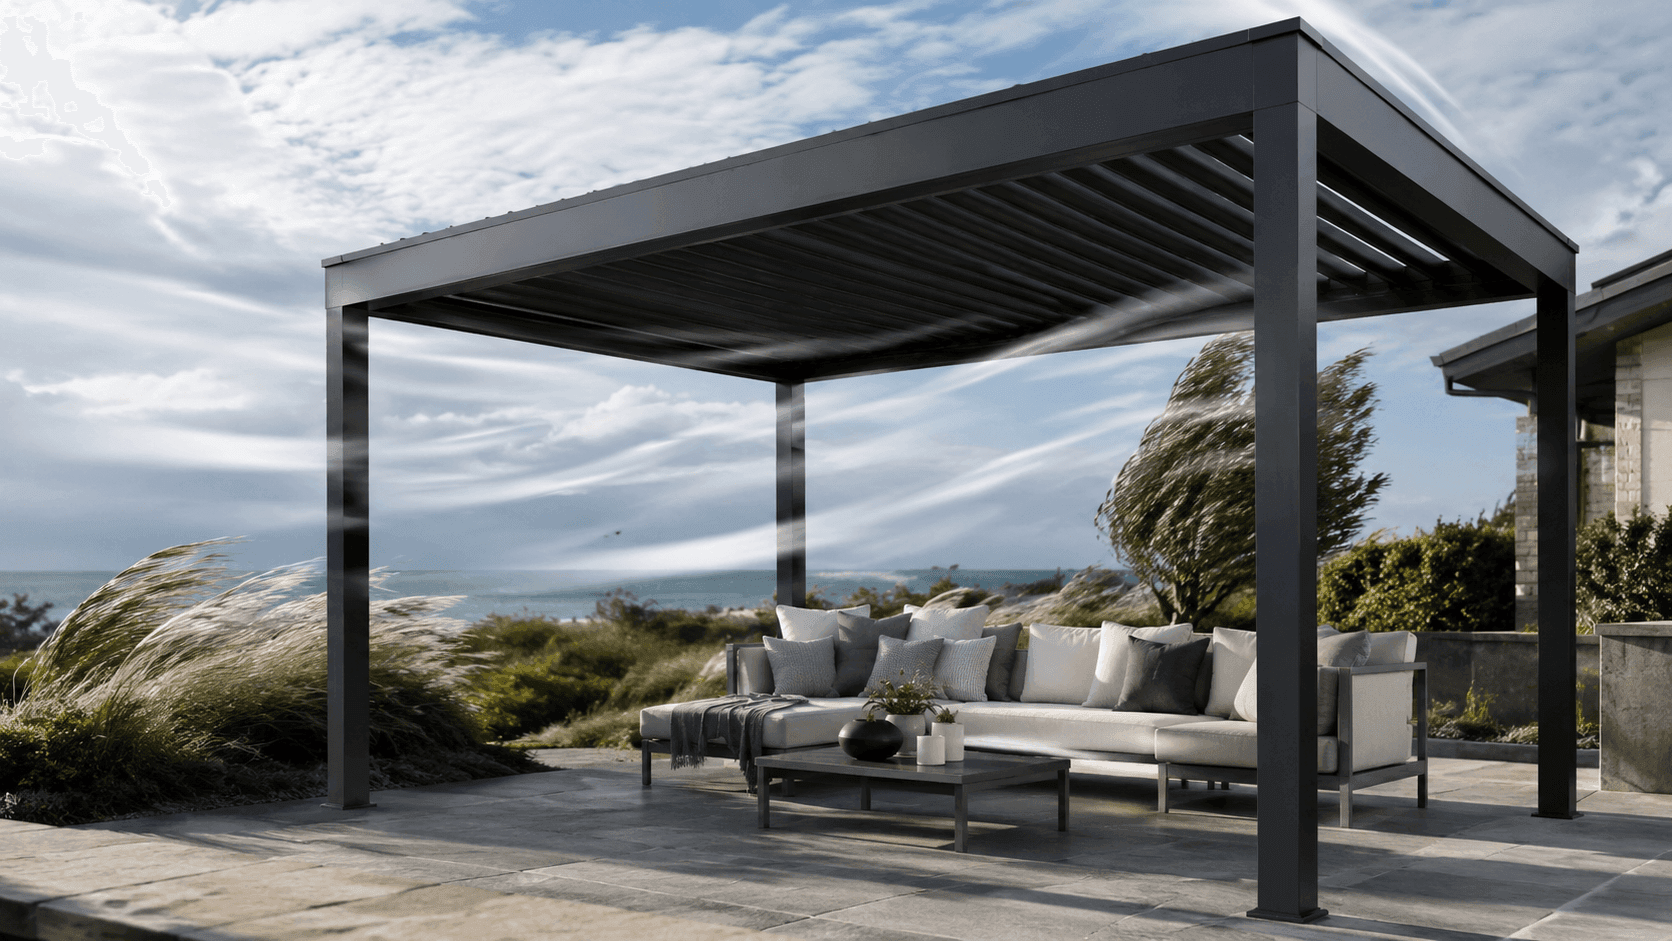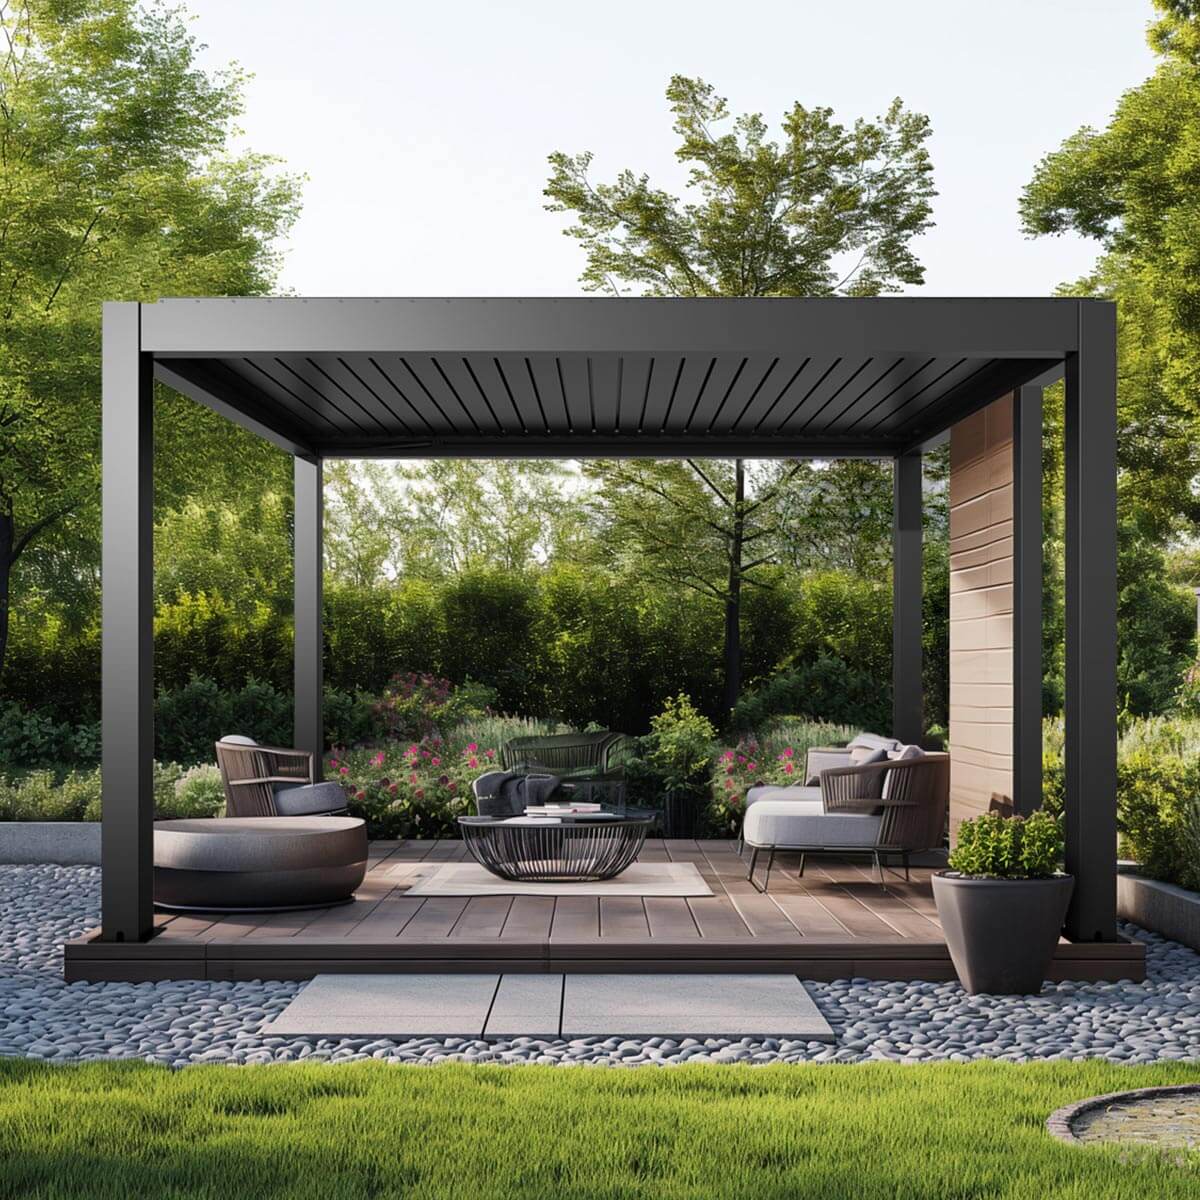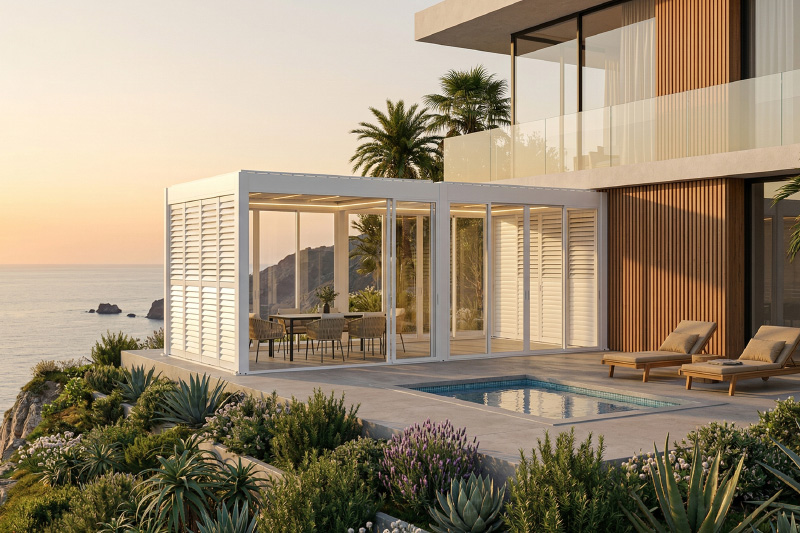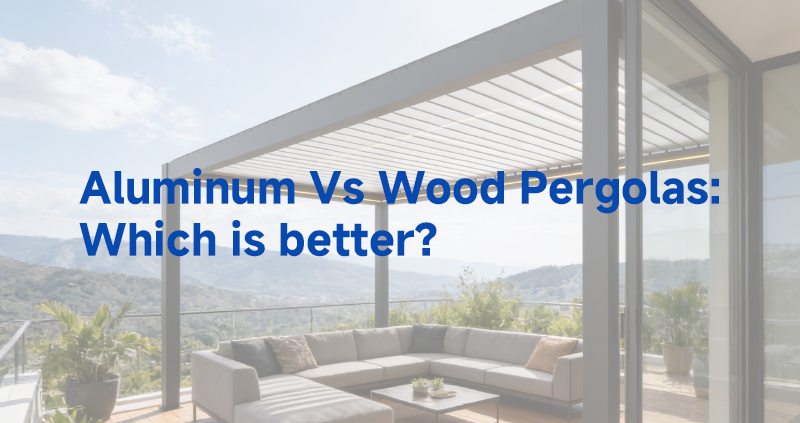
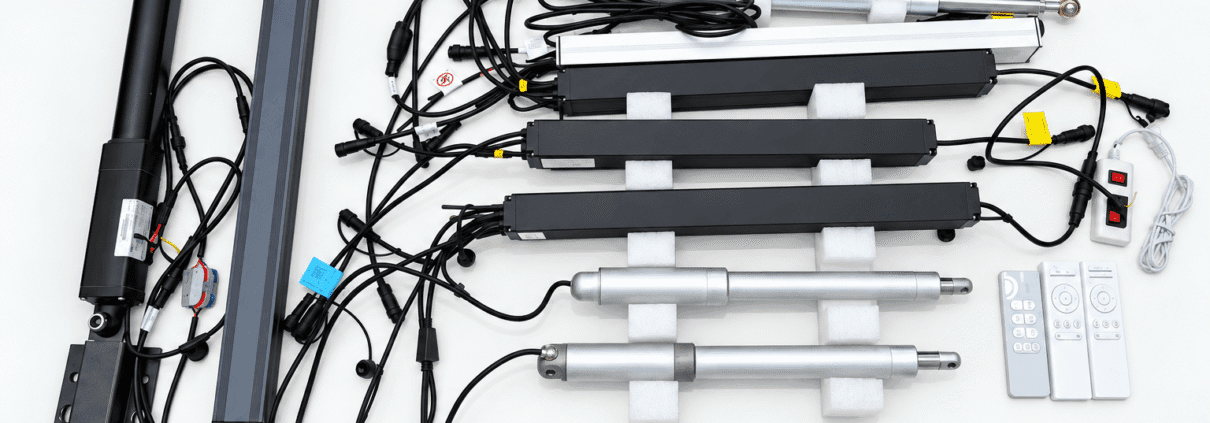
Wind-resistant aluminum pergola

Pergola Wind Resistance Standards Explained: A Guide for Buyers and Contractors

Wind-resistant aluminum pergola

Our customers often ask us: how much wind can a pergola withstand?

A properly anchored aluminum pergola typically handles 80–100 mph (about 20–30 psf) in residential settings.

Commercial louvered pergola reach 120–150 mph (40–55 psf) when the anchoring and site match the calculation. Those numbers mean nothing without the paperwork behind them.

This guide walks you through what wind ratings actually measure, the standards that govern them, and the documents you should demand before specifying a unit on a commercial job.

Understanding Pergola Wind Ratings

Pergola wind ratings is a tested failure limit under a defined anchoring condition. The rating only holds if you install exactly as tested.
 
Many purchasers are confused by different wind‑related units: some documents list wind speed in mph or m/s, while building specifications use psf or Pa. Neither is incorrect; they represent casual and engineering‑professional representations respectively. Sales brochures commonly describe wind speed using mph and m/s. By contrast, building authorities adopt wind‑load pressure (psf / Pa) for code enforcement and structural calculation.
 
Speed tells you how fast the air moves; load tells you how hard it pushes. A 90 mph gust in an open coastal field loads a structure far harder than the same 90 mph in a sheltered courtyard, because exposure changes the pressure.
Typical ranges look like this:
A standard residential aluminum pergola sits around 80–100 mph (20–30 psf) with concrete footings.
A commercial fixed-roof unit reaches 110–130 mph (35–45 psf).
A louvered, engineered system closes the gap at 120–150 mph (40–55 psf).
 
Treat these as starting points. Your site, anchoring, and local code set the real number — and the supplier’s report proves it.
 
When you read a spec sheet, find the psf value and the footnote that names the footing it assumed, not the big mph claim on the front.

The Standards Behind Wind Resistance

The codes that turn a claim into a permitASCE 7United StatesEN 1991-1-4Eurocode (EU / UK)AS/NZS 1170.2Australia / NZEach maps your location and surroundings to a design wind load.
Three standards show up on serious pergola specs.
In the United States, ASCE 7 sets the basic wind speed, exposure category, and importance factor that local codes adopt.
In the EU and UK, Eurocode EN 1991-1-4 does the same job. Australia runs AS/NZS 1170.2.
Each maps your project’s location and surroundings to a design wind load the structure must survive.
 
The word “certified” gets thrown around loosely. A real certification means a third-party lab tested the unit or a licensed professional engineer stamped a load calculation for your exact configuration.
 
In-house “we tested it ourselves” claims don’t satisfy a building official and won’t hold up on a commercial pergola permit.
 
Before you specify, ask for the test report number and the PE stamp.
 
If the supplier can’t produce both, the rating is a guess.

Commercial Pergola Wind Load Requirements

Commercial jobs carry weight that backyards don’t.
A pergola over a restaurant patio or hotel pool holds public occupants, faces insurance review, and must clear a permitting office that residential kits never see. That pushes the required load higher and the documentation stricter.
 
Exposure category drives the number more than the product does. A unit bolted to a rooftop in an open city block (Category C) or a beachfront resort (Category D) needs a bigger margin than the same model in a sheltered suburb (Category B). The structure didn’t change — the wind did.
 

Louvered Pergola Wind Resistance

Why louvered systems add wind sensors, and what they prevent

Louvered roofs feature fundamentally different load‑bearing characteristics from solid roofs, and this constitutes one of their key advantages.

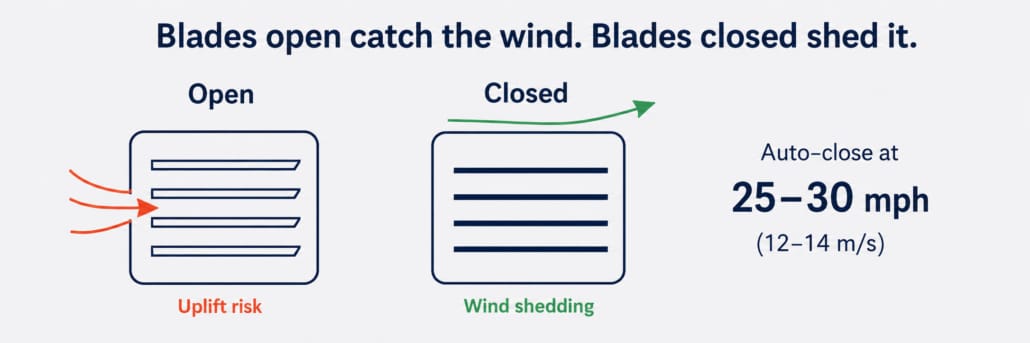
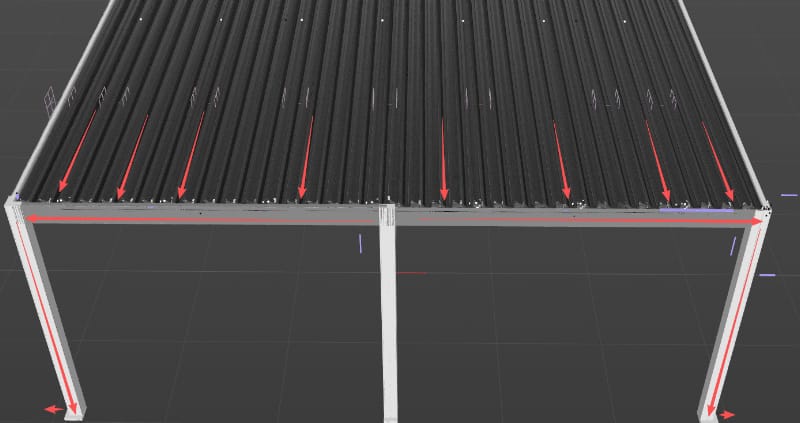
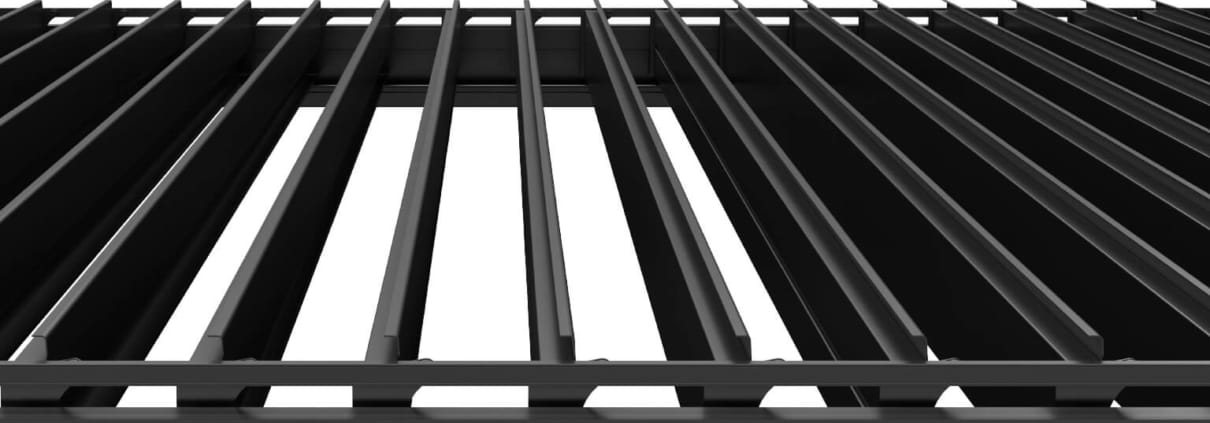
When the louvers are open, air surges upward through blade gaps and generates uplift force on the frame — the most severe loading condition for the structure. Once the louvers are closed, the roof forms a nearly solid surface to dissipate wind force and prevent stress accumulation.

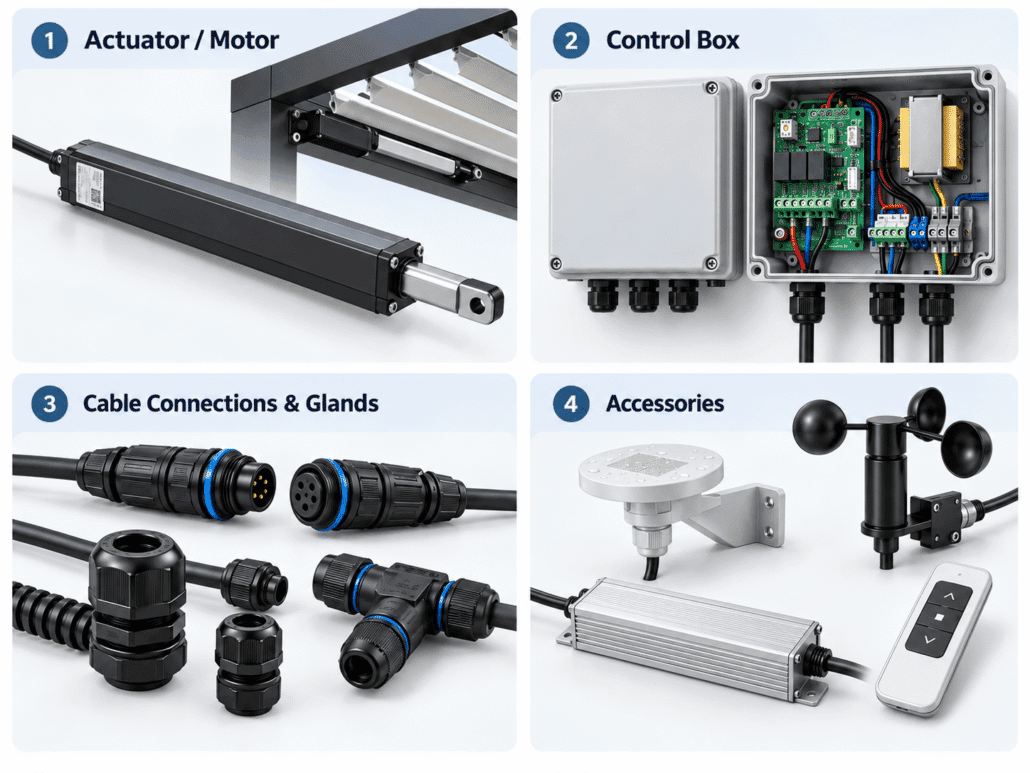
For this reason, commercial louver systems are equipped with dual‑control options: a remote controller for convenient daily operation, and a manual crank as backup. The manual crank enables manual opening and closing of louvers to keep the structure controllable in case of electric system failure or power loss.

For resorts and cafés, this dual‑control configuration is more than a safety feature; it reduces downtime and maintenance demands. 

Nevertheless, in hurricane‑prone regions or fully‑exposed coastal sites, no louver system can replace purpose‑built fixed structures engineered to meet local code requirements.

Factors That Determine Real-World Wind Resistance

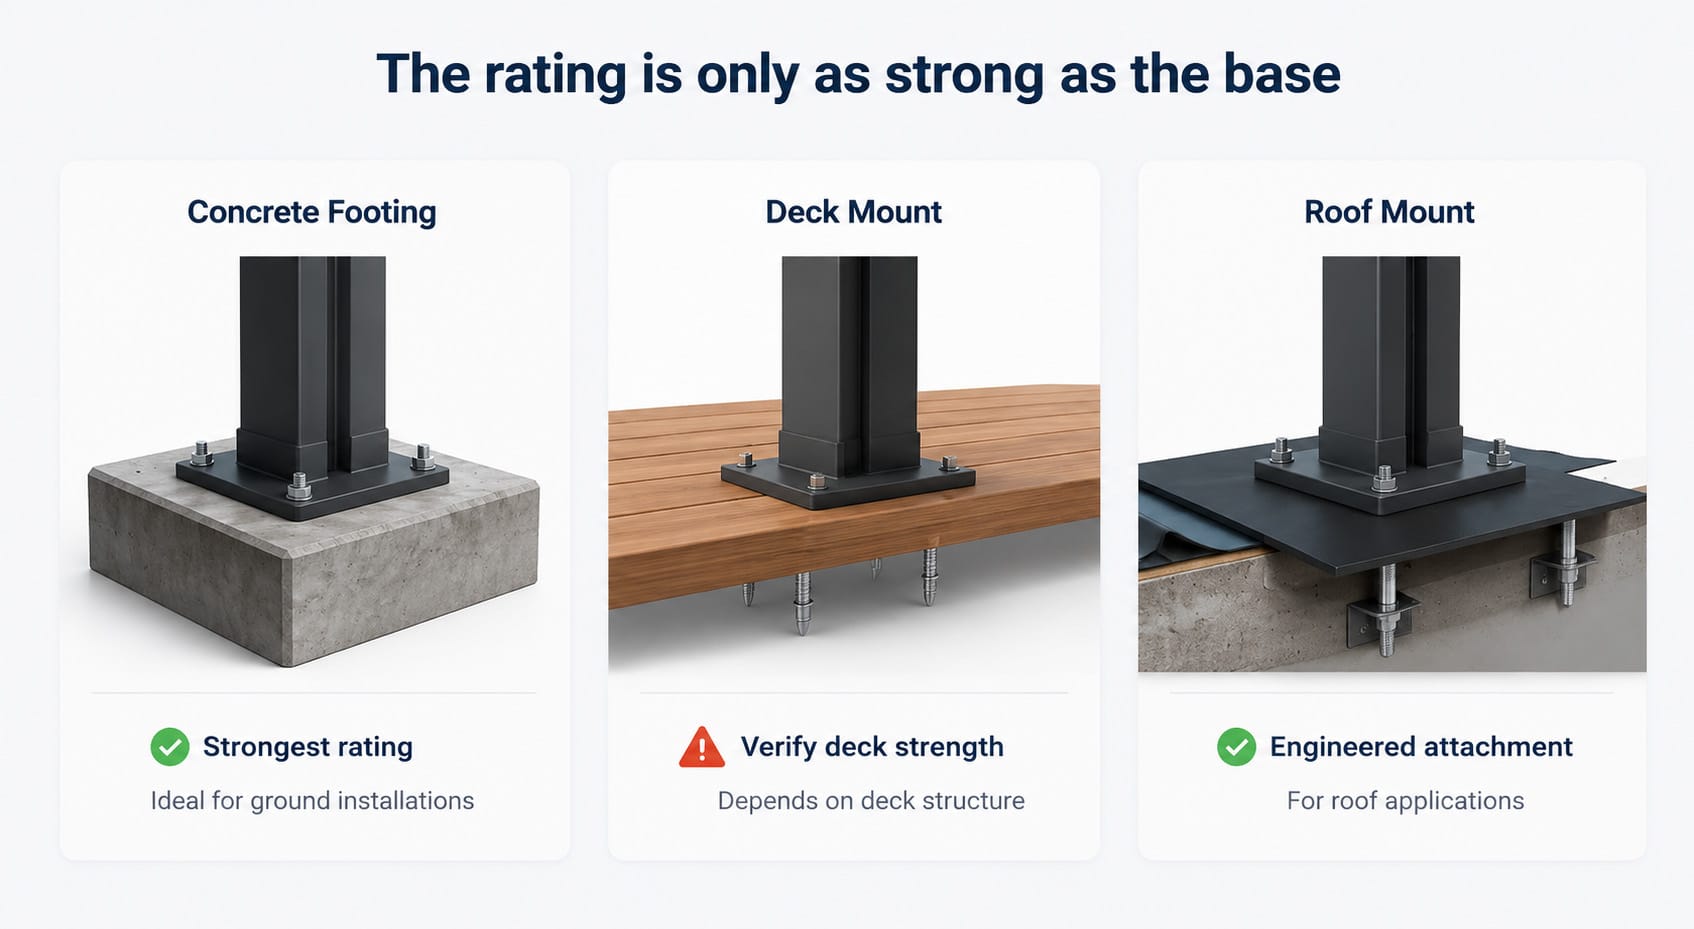
The printed rating dies at the foundation.
 
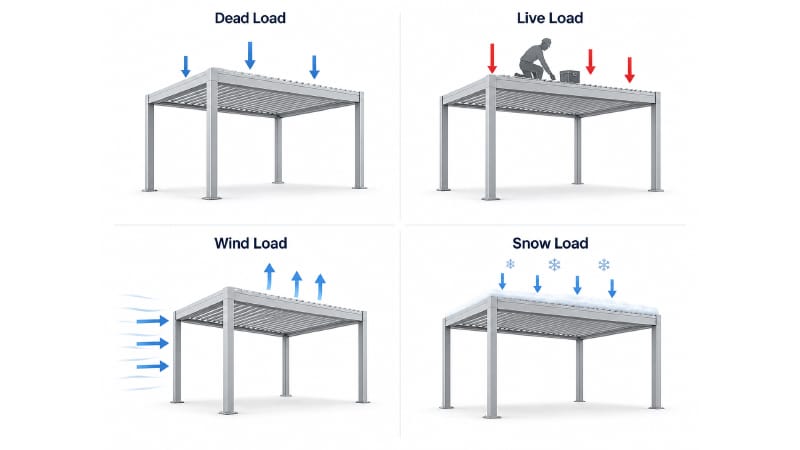
Anchoring is the number-one reason pergolas fail in wind, and it’s the easiest thing to get wrong on site.
A unit rated for 130 mph on poured concrete footings performs like a 70 mph unit on a weak deck with four lag bolts. The rating assumes the tested base.
 
The three standards most often cited on commercial pergola specs
Material sets the ceiling. Aluminum carries high strength at low weight, won’t rot like timber, and doesn’t rust like steel in coastal air — so the frame keeps its rated performance for years instead of degrading.
 
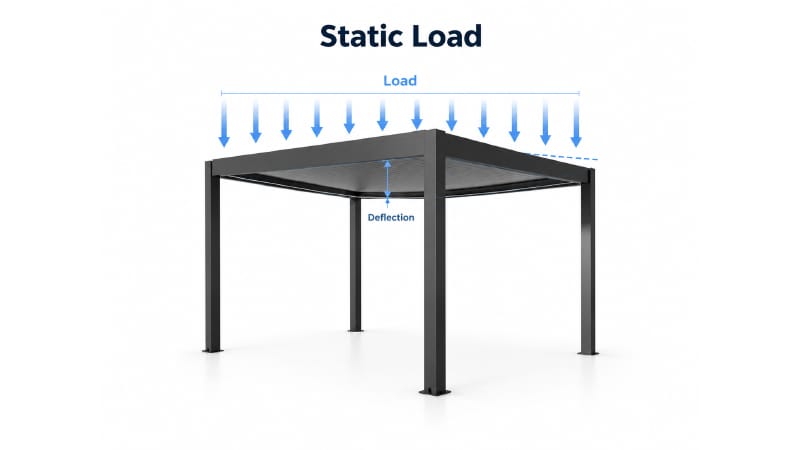
Span, post size, and bracket design are the engineering levers. Longer spans between posts flex more; bigger posts and welded or engineered brackets close that gap.
 
When a supplier quotes a number, ask what post spacing and footing it assumed. If they shrug, the number is soft.

Buyer's & Contractor's Pre-Purchase Checklist

  • Get the wind-load report and PE stamp for your exact site, not a generic brochure number.
  • Confirm the anchoring spec matches your surface — concrete, deck, or roof.
  • Check the auto-close threshold if you’re buying louvered.
  • Verify the warranty covers wind damage, then read the exclusions.
  • Match the rating to your exposure category, not the sales floor’s “standard.”
  • Ask which code (ASCE 7, Eurocode, or regional) the calculation used.
  • Confirm lead time on engineered drawings if the permit needs them.

FAQ

From site to required ratingLocationExposureOccupancyRequiredpsfCommercial = higher occupancy factor = stricter number.
How much wind can a pergola withstand?
Typically 80–100 mph residential, 120–150 mph engineered commercial — with correct anchoring.
 
Do I need a permit?
On commercial installs, almost always. The wind-load calc is usually part of the submission.
 
What wind load do commercial pergolas require?
It depends on location and exposure, commonly 35–55 psf. Your address sets it.
 
Are louvered pergolas safe in hurricanes?
Not as a standalone defense. Auto-close helps in normal storms; coastal hurricane zones need engineered fixed structures.
 
How do I verify a supplier’s claim?
Ask for the third-party test report and PE stamp. No documents, no proof.

Conclusion

Wind ratings live or die on the details: psf over mph, the right code, and anchoring done to spec. A number on a brochure means nothing without the report behind it. Before you specify or install, get the calculation, the stamp, and the warranty in writing.
 
Are you constructing a commercial pergola or specifying one for your clients? Backed by 29 years of pergola manufacturing experience, we invite you to send us your project location. We will deliver a code‑compliant proposal with clearly‑stated wind‑resistance ratings for your reference!
Share the Post:

Related Posts

Table of Contents

6063-T5 vs 6063-T6 Aluminum: Which Is Better for a Pergola?

If you are comparing aluminum pergolas, you may frequently see two specifications appear repeatedly: 6063-T5 and 6063-T6.

These two popular outdoor‑grade aluminum tempers each have clear pros. There is no single “best” choice for a pergola — so let us examine the characteristics of both materials in detail and compare their suitability for your project.

At First, What Is 6063 Aluminum?

6063 is an aluminum-magnesium-silicon alloy widely used for architectural extrusions.

It offers a useful combination of corrosion resistance, extrudability, dimensional accuracy, surface finish, and mechanical strength. It can also be extruded into relatively complex profiles, which is important for modern pergola systems.

6063-T5 and 6063-T6 share the same basic composition, as both belong to the 6063 aluminum alloy family.

The difference is the temper — the thermal treatment applied to the aluminum after extrusion.

6063-T5 vs 6063-T6: What Is the Actual Difference?

The simplest distinction is the heat-treatment process.

6063-T5

T5 aluminum is cooled after extrusion and then artificially aged.

This produces an architectural extrusion with a useful combination of strength, dimensional stability, machinability, and surface quality.

For this reason, T5 is commonly used where manufacturers need complex or precise extruded profiles rather than simply maximizing the strength of the raw material.

6063-T6

T6 receives more intensive thermal treatment to develop higher mechanical strength.

Compared with T5 of the same alloy, T6 generally provides higher tensile strength, yield strength, hardness.

A simplified comparison looks like this:

Factor6063-T56063-T6
Base alloy60636063
Material strengthLowerHigher
Yield strengthLowerHigher
Elastic modulusEssentially the sameEssentially the same
Corrosion resistanceExcellentExcellent
Architectural extrusionWidely usedWidely used
Complex profile productionWell suitedPossible, but heat-treatment control is more demanding
Pergola suitabilityDepends on structural designDepends on structural design

Is T6 Stronger Than T5?

Yes — But That Is Not the Whole Story.

Here lies a critical distinction: strength is not the same as stiffness.

What is strength vs stiffness?

Strength: How much force the material can withstand before permanent, irreversible bending and damage occurs.

Stiffness: How much the material sags under load, before bouncing back once the load is removed. This property is governed by elastic modulus.

Imagine two beams that are identical in size, wall thickness and internal geometry. The only difference is their temper.

Under normal working loads, both beams will sag by almost the same amount.

Switching to T6 will not boost beam stiffness or reduce elastic sagging.

T6 only raises the yield threshold: more force is required to permanently bend the aluminum.

If you struggle with excessive sag over long spans, you must adjust the beam’s physical design: increase beam depth or wall thickness, add reinforcing ribs, or shorten unsupported spans. Switching to T6 alone will not fix sagging.
 
Many buyers see “T6” and assume the full pergola is better‑built.

T6 describes a material property — not the performance of the finished structure.

A small, thin T6 beam cannot outperform a well‑engineered, larger‑sized T5 beam.

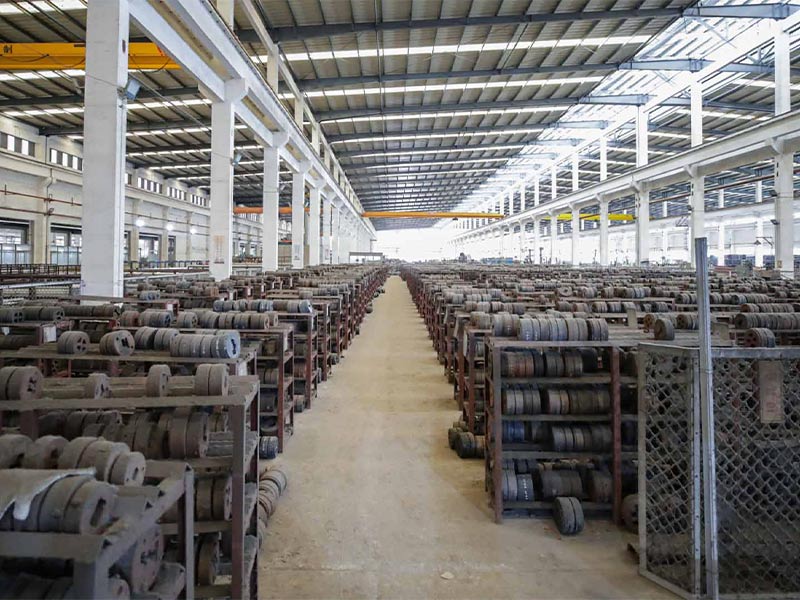
Large aluminum extrusion die storage warehouse inside manufacturing factory, rows of extrusion molds neatly arranged on racks

Why T6 Does Not Automatically Mean a Stronger Pergola

A pergola is a system made from multiple structural members and connections working together.

Several design factors can have a major effect on its final performance.

1. Profile Geometry

Increasing the depth of a structural profile or changing the position of internal ribs can significantly increase its resistance to bending.

This is why two aluminum beams using exactly the same temper may behave very differently.

2. Wall Thickness

“6063-T6” does not tell you whether a beam wall is 1.5 mm, 2 mm, 3 mm, or something else.

Likewise, “6063-T5” does not tell you the amount of aluminum actually used in the structure.

Temper needs to be considered together with the dimensions of the extrusion.

3. Unsupported Span

A beam used across a relatively short module faces different demands from a long-span beam covering a large commercial terrace.

This is why maximum recommended span is often more useful to a buyer than the temper specification alone.

4. Reinforcement

Pergola manufacturers can use internal ribs, reinforced cavities, inserts, or additional structural elements to increase performance in critical areas.

These features cannot be identified simply by looking at the T5 or T6 label.

5. Connection Design

Posts, beams, and louvers do not work independently.

Brackets, fasteners, internal connectors, corner joints, and base plates determine how loads move through the structure.

A high-strength extrusion connected through a poorly designed joint does not automatically produce a high-performance pergola.

6. Anchoring

Wind forces eventually need to be transferred through the frame and into the foundation.

Base plates, anchors, concrete conditions, installation accuracy, and local engineering requirements therefore affect complete-system performance.

This is why comparing pergolas only by aluminum temper can be misleading.

The material matters. The engineering around the material matters too.

Is 6063-T5 Strong Enough for a Pergola?

Yes — when the pergola has been designed around the mechanical properties of 6063-T5 and meets the required structural conditions for the project.

T5 is not limited to decorative trim, louvers, or small residential structures.

A properly designed T5 system can achieve significant structural performance because engineers can design the cross section and complete system around the known mechanical properties of the material.

What Should Buyers Compare Beyond T5 vs T6?

If you are a distributor, contractor, architect, or commercial project buyer, asking about aluminum temper is useful.

Here are the specifications worth comparing:

SpecificationWhat It Tells You
Aluminum alloy and temperBaseline material properties
Beam and post dimensionsOverall size of structural members
Wall thicknessAmount of material within the profile
Cross-sectional designHow efficiently the profile resists bending
Internal reinforcementAdditional support in critical areas
Maximum recommended spanIntended structural range
Wind resistancePerformance under lateral and uplift forces
Roof load capacityAbility to resist vertical loading
Connection systemHow loads transfer between components
Anchoring requirementsHow the structure transfers loads to the foundation
Testing / engineering documentationEvidence supporting performance claims

Consider a simple example.

Pergola A uses T6 aluminum but has a smaller beam section and relatively thin walls.

Pergola B uses T5 aluminum but has a deeper profile, thicker walls, optimized internal ribs, and reinforced connections.

Which structure is stronger?

There is not enough information to answer.

You would need to compare the complete structural specification and the loads each system is designed to resist.

This is also why phrases such as:

“Made from high-strength 6063-T6 aluminum”

should not be treated as complete proof of pergola performance.

It is a useful material specification — but it is still only one specification.

For serious projects, ask the supplier for information relating to the finished system, including its wind resistance, load capacity, span limits, anchoring requirements, and relevant engineering or test documentation.

T5 vs T6 Should Not Be the Only Buying Decision

So, which is better for a pergola: 6063-T5 or 6063-T6?

If you compare the material alone, T6 is stronger. Its higher yield and tensile strength can provide useful engineering advantages.

But a pergola is not made strong by a temper designation alone.

That means a T6 pergola should not automatically be considered stronger than a T5 pergola from another supplier without comparing the rest of the structural specification.

For buyers comparing pergola manufacturers, the better question is therefore not simply:

“Do you use T5 or T6?”

Ask:

“What is the complete structural specification of the pergola, and what performance is the finished system designed to achieve?”

That answer will tell you far more about the pergola you are actually buying.

If you are still undecided about which material is best for your pergola, contact us today for professional advice and a customized pergola solution!

OEM/ODM Solutions to Elevate Your Outdoor Brand Value

Ready to take your outdoor product line to the next level? Contact Greenawn. Let us help you elevate your brand with our bespoke solutions tailored for the outdoor industry.

Phone

+86 13622239259

Email

sale2@greenawn.com.cn, sale15@greenawn.com.cn

Find us Here

Building A, No. 13 Bangyan Road, Dalong Street, Panyu District, Guangzhou
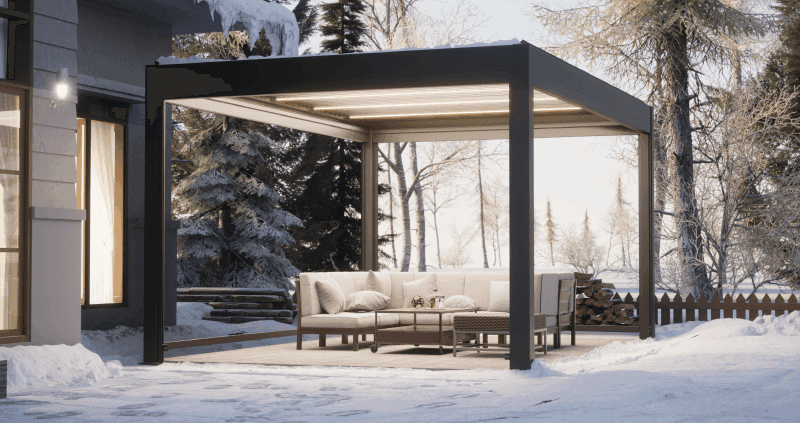
Louvered pergola drainage path from roof gutters through support posts to ground outlets

Table of Contents

How a Louvered Pergola Drainage System Works?

Have you ever wondered where all that rainwater goes when a motorized louvered pergola is fully closed during a downpour?

The answer is hidden within the pergola itself. 

At Greenawn, the drainage system is considered a crucial part of the pergola’s structural design.

If you’re an architect or contractor designing outdoor spaces for restaurants, hotels, and resorts, understanding how this drainage system works is essential.

What Is a Louvered Pergola Drainage System?

A louvered pergola drainage system is a network of channels, outlets, and vertical drainage paths designed to collect and discharge rainwater from the pergola roof.

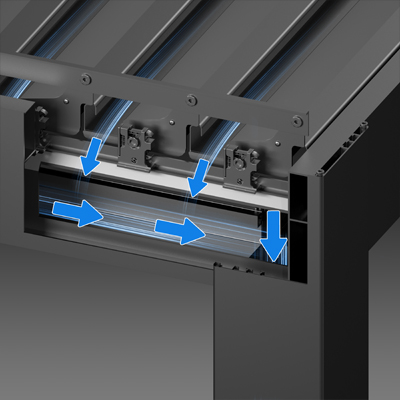
Unlike a conventional roof, many modern aluminum pergolas integrate these components into the structure itself. The horizontal beams can incorporate gutter channels, while hollow posts provide space for concealed downpipes or internal drainage paths.

A typical system consists of:

  1. gutter channels integrated into or attached to the beams;
  2. drainage openings or outlets connecting the gutters to vertical drains;
  3. internal downpipes or drainage channels within the posts;
  4. ground-level outlets or connections to external drainage infrastructure.

The exact configuration varies according to pergola size, roof layout, number of modules, local rainfall conditions, and manufacturer design.

Where Does The Water Go From A Louvered Roof Pergola?

Although drainage layouts vary between pergola systems, the basic water path follows the same principle:

RAINWATER FLOW PATH
01 Louvers Collect rainwater
02 Beam Gutters Channel the flow
03 Drainage Outlets Direct water downward
04 Posts Concealed vertical drainage
05 Ground Drainage Final discharge point

Step 1: Water Moves From the Louvers Into the Beam Gutters

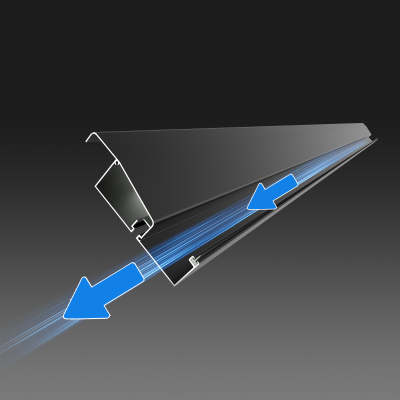
Rainwater collected on the roof is directed toward the perimeter or intermediate beams containing the gutter channels.

The geometry of the louvers and their relationship with the surrounding beams determine where this runoff enters the gutter system. 

On larger pergolas, different sections of the roof may direct water toward different gutters to avoid concentrating the entire roof catchment in one channel.

Step 2: Beam Gutters Direct Water Toward Drainage Outlets

Once water reaches the gutter, it must travel horizontally toward one or more drainage points.

This is where gutter dimensions, outlet positioning, and slope become important.

A gutter must provide enough flow capacity for the roof area it serves, while the drainage outlets need to be positioned so water does not have to travel unnecessarily long distances.

Long gutter runs or large catchment areas may require multiple outlets rather than relying on a single drainage point.

Step 3: Water Enters the Internal Post Drainage System

At the drainage outlet, water moves from the horizontal gutter into the vertical drainage path.

In many aluminum louvered pergolas, this path is concealed inside the supporting posts.

Depending on the design, the post itself may function as part of the drainage channel, or a separate downpipe may be installed inside the hollow post.

Step 4: Water Is Discharged at Ground Level

At the bottom of the post, water must leave the pergola structure.

The discharge method depends on the project. Water may exit through an opening near the base of the post and flow onto a suitable surface, or the post drainage may connect directly to an underground stormwater system.

For commercial projects, the second approach often requires coordination between the pergola supplier, contractor, architect, and site drainage designer before installation.

Integrated vs. Exposed Pergola Gutters

Pergola drainage systems can generally use either integrated or externally exposed gutters.

CONCEALED SYSTEM

Integrated Gutter

Built directly into the pergola beams and frame, an integrated gutter system keeps most drainage channels and downpipes concealed within the structure. Rainwater is collected and directed through the frame into designated drainage posts, creating a cleaner architectural appearance with fewer visible components.

Hidden Drainage Clean Appearance Integrated Structure
VS
EXTERNAL SYSTEM

Exposed Gutter

Mounted along the outside of the pergola frame, an exposed gutter system collects and redirects rainwater through visible gutters and external downpipes. Although these components have a greater visual impact, their exposed position generally makes inspection, cleaning, and maintenance easier.

Easy Access Visible Downpipes Simple Maintenance

How Are Drainage Outlets Sized and Positioned?

One common misconception is that each support post of the pergola can serve directly as a drainage pipe, eliminating the need to specifically plan the locations and specifications of drainage outlets.

In fact, the required number and position of drainage outlets depend on several factors:

  1. pergola roof area;
  2. gutter dimensions;
  3. rainfall intensity;
  4. length of the gutter run;
  5. number and location of drainage posts;
  6. overall drainage layout.

A larger gutter alone does not guarantee good drainage. If the number of outlets is insufficient, water can still accumulate faster than it can leave the channel.

Outlet position is equally important. The system should minimize unnecessary water travel and avoid creating sections where water can remain trapped.

For larger projects, drainage points may therefore be distributed across several posts instead of directing all runoff toward one location.

Why Gutter Slope and Installation Tolerances Matter

Drainage performance depends not only on the product design but also on installation accuracy.

If a pergola is incorrectly leveled, water may collect in low areas rather than following the designed drainage path.

Even relatively small alignment errors can become more significant over a long gutter run.

For this reason, installers should follow the manufacturer’s leveling requirements, foundation specifications, assembly instructions, and permitted installation tolerances rather than attempting to create an arbitrary slope on site.

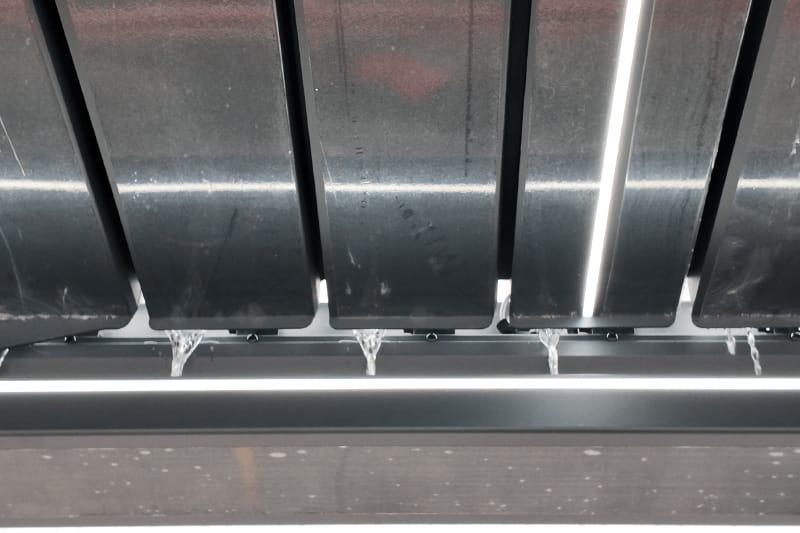
Rainwater flowing from pergola louvers into the integrated beam gutter

What Causes Clogging, Overflow, and Leakage?

A properly designed drainage system can still experience problems if its flow path is obstructed, incorrectly installed, or undersized for the conditions.

Clogged gutter channels are commonly caused by leaves, dust, insects, and other outdoor debris. Accumulated material reduces the effective cross-sectional area available for water.

Blocked drainage outlets can be more serious because they restrict the transition from the horizontal gutter into the vertical drainage system.

Overflow can occur when incoming water exceeds the combined capacity of the gutter and its outlets. This may result from blockage, insufficient outlet capacity, unusually intense rainfall, or a drainage system that was not appropriately sized for the roof area.

Standing water often indicates a problem with gutter alignment, drainage slope, outlet positioning, or blockage.

Leakage within the drainage system may occur around gutter joints, module connections, outlet interfaces, or improperly sealed assembly points. This should be distinguished from water entering through other parts of the pergola structure: identifying the actual source is important before corrective work begins.

How Is Drainage Designed for Large Commercial Pergolas?

Drainage design becomes more demanding as roof coverage increases. A 100 m² commercial pergola, for example, must manage substantially more runoff than a 15 m² residential unit.

For this reason, large pergola projects require coordinated drainage planning.

At Greenawn, drainage is considered as part of the complete pergola configuration. Roof area, project layout, gutter routing, drainage points, and site conditions are evaluated together so that the drainage system can be matched to the scale and application of the project.

This is particularly important for hotels, restaurants, resorts, large terraces, and other commercial outdoor spaces, where the drainage layout often needs to accommodate larger roof areas and more complex structural configurations.

How Does Drainage Work in Multi-Module Pergola Systems?

For multi-module pergolas, the main challenge is how to divide a larger roof area into efficient drainage zones rather than directing all collected water toward a single side or outlet.

For example, in a double-unit connected pergola, the central connection area can be designed as a higher point. From there, the roof slopes toward the two outer sides, allowing rainwater to flow in opposite directions. Water then enters the integrated side gutters, passes through the drainage outlets, and is discharged through concealed drainage channels inside the corresponding support posts.

This central split-flow, dual-side drainage approach reduces the amount of water concentrated in a single direction, shortens the distance water needs to travel, and distributes the drainage load more evenly across the gutters, outlets, and support posts.

For larger multi-module systems, the same principle can be extended by dividing the roof into several independent catchment and drainage zones. Each zone can be routed toward designated gutters and drainage posts according to the overall module layout.

Module connections also need careful coordination. Gutter alignment, connection joints, outlet positions, roof slope, and installation tolerances can all influence how effectively water moves through the system.

For large multi-module projects, drainage should therefore be coordinated with the pergola dimensions, module configuration, roof slope, outlet layout, and site drainage conditions during the design stage, rather than being treated as an installation detail later in the project.

How Is a Pergola Drainage System Tested?

Drainage testing helps confirm that water follows the intended path before the pergola enters regular service.

Factory Testing

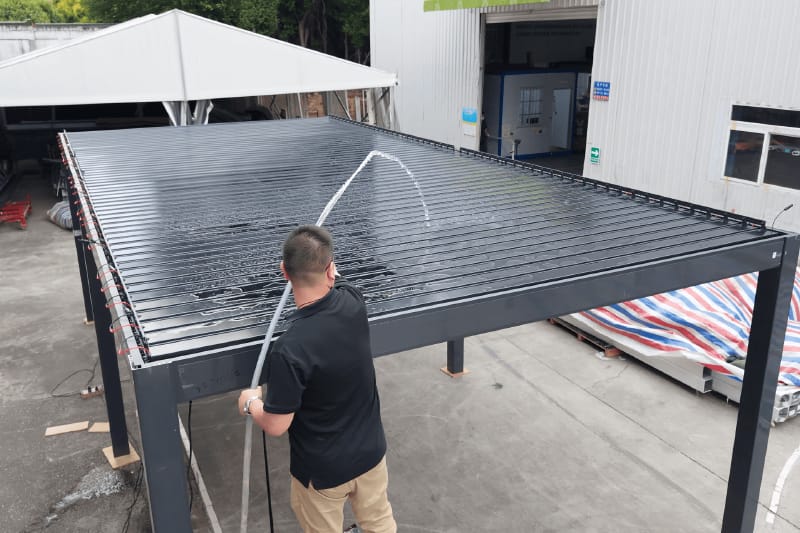
At Greenawn, assembled pergola sections can undergo a basic water-flow test using a hose or direct water application. Water is applied to the closed louvered roof and allowed to move naturally through the drainage system.

During the test, technicians observe whether water enters the gutter channels correctly, flows toward the intended outlets, passes through the drainage posts, and exits from the bottom of the structure as designed.

The test also makes it easier to identify visible issues such as abnormal standing water, blocked drainage paths, or leakage around gutter joints and critical connection points.

For custom or multi-module pergolas, additional attention can be given to module connections, shared gutters, drainage transitions, and other interfaces where several sections of the system meet.

Although this is a simple test, it provides a practical way to verify the drainage path with real water before the pergola leaves the factory.

Factory water-flow test on an aluminum louvered pergola drainage system

On-Site Testing

Final drainage performance should also be checked after installation because site conditions, foundation levels, assembly accuracy, and connections to external drains cannot be fully evaluated at the factory.

A controlled water test can be used to check:

  • whether water flows toward the intended outlets;
  • whether water remains standing in the gutters;
  • whether drainage posts discharge correctly;
  • whether gutter and module joints show leakage;
  • whether ground-level outlets or underground connections function correctly.

For commercial projects, these checks can form part of installation inspection or project handover.

Does a Louvered Pergola Drainage System Require Maintenance?

Yes. Although an integrated drainage system is largely concealed within the pergola structure, it still requires periodic inspection to maintain an unobstructed water path.

Leaves, dust, and other debris can accumulate in gutter channels or around drainage openings, while ground-level outlets can also become blocked over time. Pergolas installed beneath trees or in environments with more airborne debris may therefore require more frequent attention.

Regular inspection helps ensure that water can continue to move freely from the gutters through the posts and out of the drainage outlets. For detailed cleaning methods and maintenance procedures, see our How to Maintain a Louvered Pergola guide.

What Should Buyers Ask About a Pergola Drainage System?

For dealers, contractors, architects, and commercial project buyers, drainage should be evaluated before ordering rather than after installation.

Useful questions for a pergola manufacturer include:

  1. What are the gutter dimensions and drainage capacity?
  2. How many drainage outlets are used for this pergola size?
  3. Where are the drainage outlets positioned?
  4. Which posts contain drainage channels or downpipes?
  5. How is drainage calculated for larger roof areas?
  6. How are multi-module gutter connections designed?
  7. What installation tolerances affect drainage?
  8. Can the posts connect to underground drainage?
  9. What drainage tests are performed before delivery?

For custom projects, these questions help determine whether the proposed system has been designed around the actual roof area and site conditions rather than simply scaled up from a standard pergola.

Planning Your Next Pergola Project?

Whether you are planning a freestanding pergola for a residential patio or a large multi-module system for a hotel, restaurant, or commercial terrace, drainage should be considered as part of the complete pergola design.

From standard pergola systems to customized sizes, configurations, and multi-module layouts, Greenawn supports projects from design and manufacturing through delivery.

Have a pergola project in mind? Send us your dimensions, layout, application, and project requirements. Our team can help you find the right pergola configuration for your project.

Frequently Asked Questions

Where does water drain from a louvered pergola?

Water typically enters gutters incorporated into the pergola beams, travels toward drainage outlets, flows down through designated posts, and exits at ground level or into a connected site drainage system.

Do pergola posts contain internal drains?

Many aluminum louvered pergolas use hollow posts to conceal drainage paths or internal downpipes. However, not every post necessarily functions as a drain; the configuration depends on the system design.

Why is water standing in my pergola gutter?

Common causes include debris, blocked outlets, incorrect alignment, insufficient drainage slope, or installation outside the manufacturer’s specified tolerances.

What causes a pergola gutter to overflow?

Overflow can occur when gutters or outlets are blocked, drainage capacity is insufficient, or rainfall exceeds the system’s design capacity.

How many drainage outlets does a pergola need?

There is no universal number. Outlet quantity should be determined by roof catchment area, gutter capacity, outlet size, rainfall conditions, flow distance, and the overall drainage layout.

How is drainage handled between multiple pergola modules?

Multi-module systems may use separate drainage zones or shared gutters. The appropriate configuration depends on the total roof area, module arrangement, outlet capacity, and structural design.

OEM/ODM Solutions to Elevate Your Outdoor Brand Value

Ready to take your outdoor product line to the next level? Contact Greenawn. Let us help you elevate your brand with our bespoke solutions tailored for the outdoor industry.

Phone

+86 13622239259

Email

sale2@greenawn.com.cn, sale15@greenawn.com.cn

Find us Here

Building A, No. 13 Bangyan Road, Dalong Street, Panyu District, Guangzhou
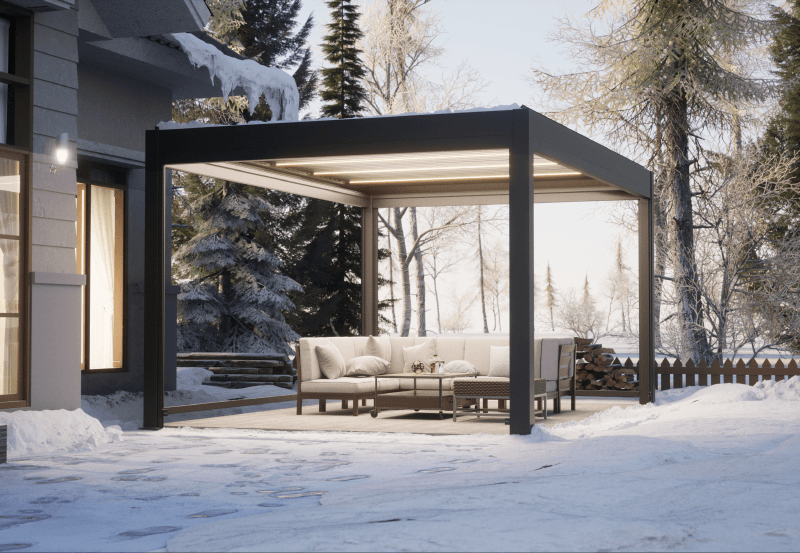
louvered roof

Table of Contents

What Is a Louvered Roof and How It Works

You probably seen the term “louvered roof” everywhere. And maybe you are wondering what makes it different from a regular pergola or a retractable awning.
 
This guide helps you understand the working principle of louvered roofs, the practical implications of various specification parameters, and how to choose a suitable louvered roof for your space.
adjustable louver roofable louver roof

What Exactly Is a Louvered Roof?

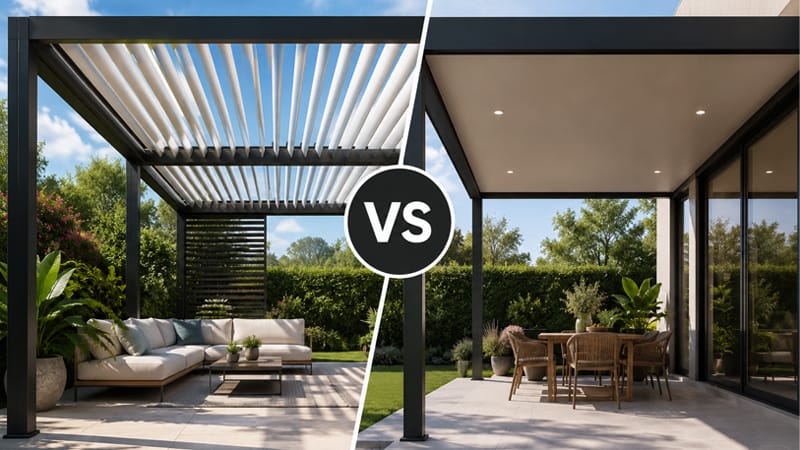
A louvered roof is an adjustable overhead structure made of rotating aluminum blades (louvers) mounted on a sturdy frame.
 
It sits somewhere between a fixed pergola and a full sunroom. It gives you the openness of outdoor living without the gamble of weather.

Beyond the Awning: It Is More Than a Retractable Roof

A lot of people group louvered roofs with retractable awnings. They are not the same thing. An awning rolls out fabric. A louvered roof is a rigid aluminum structure built to stay up year-round.
🌂 Retractable Awning 🏠 Louvered Roof
Fabric canopy, retracts into a cassetteRigid aluminum blades, rotate in place
Wind rating: usually 20–30 km/h Wind rating: 100–120 km/h when closed
No drainage systemIntegrated gutter + downpipe
Manual or basic motorSmart sensor + app control
5–8 year lifespan (fabric fades)20+ year lifespan (powder-coated aluminum)
Needs retracting in bad weatherStays deployed in all weather

The “All-in-One” Roof Concept

A good louvered roof integrates several systems into one structure. You are not buying separate pieces and trying to make them work together:
01

Sun Control

The louvers rotate through 135 degrees, giving you precise control over sunlight throughout the day.

  • 90°: Full sun and open sky
  • 45°: Filtered natural light
  • 0°: Full shade and coverage
You set the angle, not the sun.
02

Rain Protection

Closed louvers overlap with integrated rubber seals, directing rain away from the covered area.

  • Water flows into concealed frame gutters
  • Drainage runs through the support posts
  • No visible downspouts unless required
03

Wind Resistance

When closed, the louvers form a rigid interlocked roof surface designed to withstand demanding outdoor conditions.

  • Tested for specific wind-load requirements
  • Rigid aluminum structural system
  • No need to retract it before every storm
04

Automation

Smart controls allow the roof to respond automatically to changing weather and everyday routines.

  • Rain and wind sensor integration
  • Remote control and mobile app operation
  • Scheduling and smart-home connectivity

Key Components at a Glance

Three things determine how well a louvered roof performs:
The Louvers. Usually 6063-T5 aluminum extrusions. The wall thickness matters. Thicker walls mean less flex under load. Most residential systems use 1.6mm to 2.0mm wall thickness. The blade profile determines how well they interlock when closed.
The Motor. Hidden inside the frame beam. Tubular motors are the standard. Torque rating determines how many louvers one motor can drive. A single motor typically handles spans up to 4 meters. Longer spans use synchronized dual motors.
The Drainage. Gutters inside the frame beams collect water from closed louvers. Water exits through the post feet or underground drainage connections. If someone tells you their louvered roof is 100% waterproof but does not have internal gutters, ask more questions.
louvered-roof-drainage-system louvered roof drainage system

How Does a Louvered Roof Work?

 
The system looks simple from the outside. Beneath the surface, multiple mechanical components work in concert to enable the louvers to rotate smoothly, seal tightly, and drain silently.
 

The Rotation System: Open to Closed in 3 Seconds

Each louver is fixed at both ends to a rotating bracket. A tubular motor inside the main beam drives a rack-and-pinion or linkage mechanism. When the motor turns, all louvers rotate simultaneously.
 
The rotation range is usually 0 to 135 degrees. The extra 45 degrees past vertical is useful. It lets the louvers tilt slightly past flat to shed dust and debris, or angle to block low afternoon sun.
 

The Drainage Design: Where the Water Goes

This is the part most buyers overlook. A louvered roof that closes but cannot drain properly is just a giant bucket over your head.
 
When louvers close, each blade overlaps the next one. Rubber EPDM seals on the blade edges create a continuous slope. Water runs down the surface into side channels integrated into the main beams.
 
From there it flows through the hollow frame posts and exits at ground level.
The minimum slope for drainage is built into the blade profile. You do not need to install the whole structure at an angle. The louvers themselves create the pitch.
 

Smart Control: Sensors and Automation

  • Rain Sensor. Mounted on the frame, it detects moisture and triggers automatic closure. Most systems close within 30 seconds of the first rainfall.
  • Wind Sensor. Measures gust speed. If wind exceeds the rated threshold, the system can close the louvers for safety or send an alert through the app. This is especially important for coastal areas and high-rise installations.
  • Sun/Temperature Sensor. An optional sensor that can trigger partial closure during peak heat or automatically reopen the louvers when sunlight returns.

Control options range from a simple RF remote to a wall-mounted touch panel to full smartphone integration. Some systems support voice control through Alexa or Google Home.

Internal Components Summary

ComponentFunctionBenefit
Aluminum LouversRotate to control light and seal against rain20+ year life, no rust, no paint
Tubular MotorDrives louver rotationSilent operation, synchronized movement
EPDM SealsRubber edge gaskets between louversWatertight when closed, UV-resistant
Internal GuttersCollect rainwater inside frame beamsHidden drainage, no visible downspouts
Control SystemRain/wind sensors + remote/appAutomatic weather response

 4 Ways a Louvered Roof Can Be Installed

How you mount the structure affects cost, look, and how much outdoor space you actually gain. Four common configurations cover most projects.
 

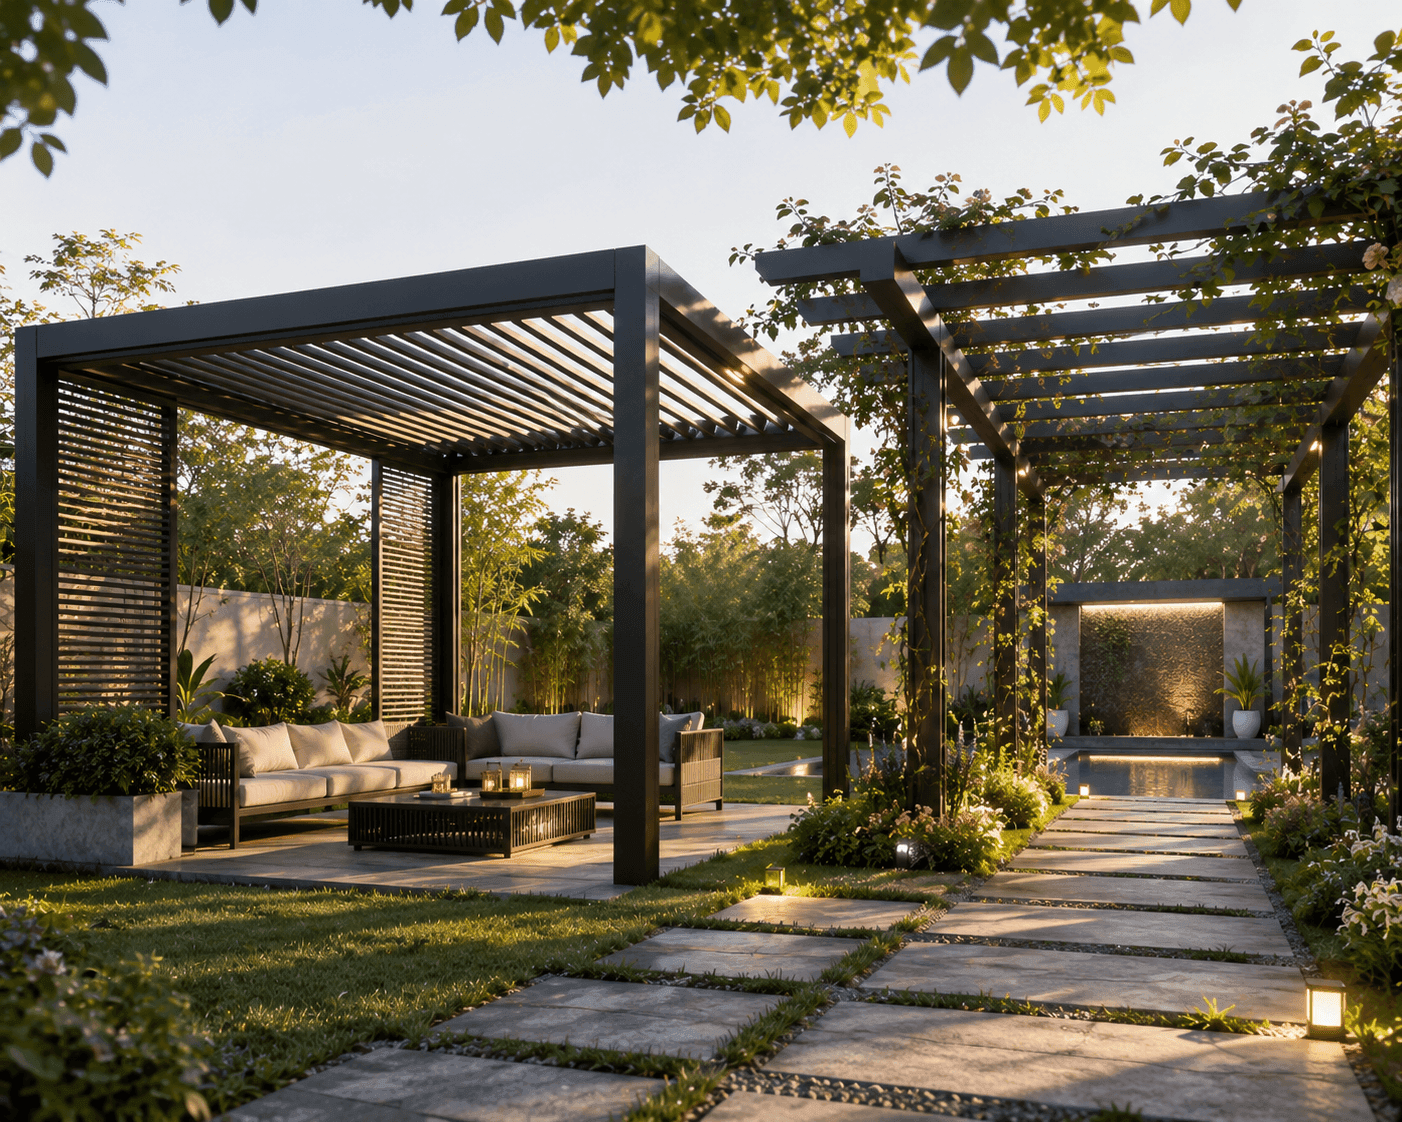
Freestanding Pergola

Four posts. No wall attachment. This is the most flexible option. You can place it anywhere in a yard or garden. Requires concrete footings or ground screws for each post. The structure is self-supporting. Ideal for creating an outdoor dining area in the middle of a lawn.
 

Wall-Mounted (Attached Pergola)

One side bolts to an existing wall. The other side sits on two posts. This is the go-to for patios directly off the back of a house. Saves space. Less steel in the frame since the wall provides lateral support. The flashing where the roof meets the wall needs proper waterproofing.
 

Integrated into a New Build

The louvered roof is designed in from the start, not added later. Posts can be embedded into the building structure. The drainage connects directly to the building’s stormwater system. Cleaner look, fewer visible fixings. Costs more upfront but eliminates retrofit compromises.
 

Commercial / Large Span

Spans over 5 meters. Uses heavier beams, larger motors, and often bay-to-bay linking. Common in restaurant patios, hotel pool decks, and public plazas. These installations need structural engineering sign-off. Wind load calculations become critical at this scale.
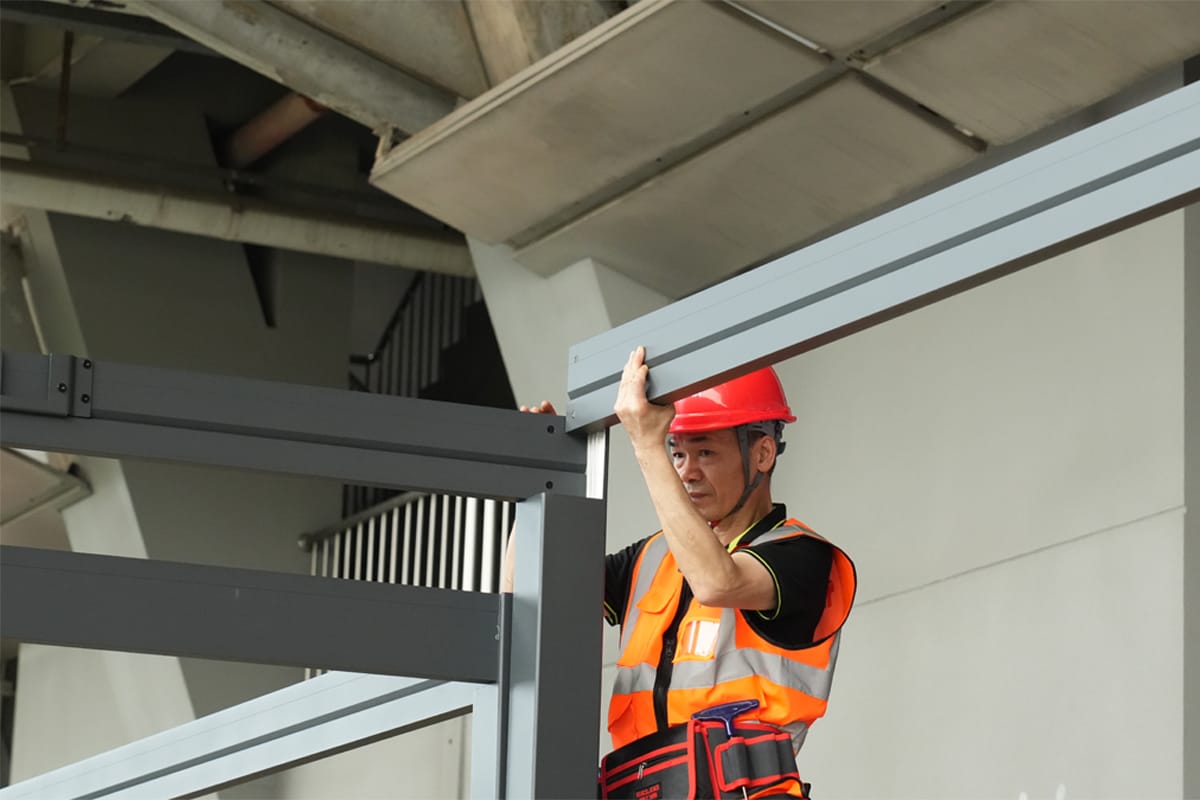
Installers are measuring the dimensions for the aluminum pergola.

Deciphering the Specs: What the Numbers Mean

When you look at product sheets, you will see numbers that look technical. Here is what actually matters and why.

Three Specs That Actually Matter

SpecWhat It RepresentsWhy It Matters
Span (m)Maximum distance between postsDetermines how big your covered area can be (and the cost)
Louver Wall Thickness (mm)Aluminum extrusion thicknessDetermines rigidity under load and overall durability
Wind Load Rating (km/h)Certified maximum wind speedDetermines safety in storms and suitability for exposed sites

Span: How Big Can You Go?

Span is the distance between two support posts (or between a wall and a post). Residential systems typically span 3 to 4.5 meters per bay. Commercial systems with reinforced beams can go to 6 meters or more.
Longer spans need bigger beams and stronger posts. Price climbs sharply above 4 meters. If you need to cover a large area, two or three connected bays often cost less than one oversized single bay.

Louver Construction: Why Wall Thickness Matters

Aluminum louvers are hollow extrusions. The wall thickness directly affects how much they flex under load. At 1.4mm, you will see visible bending on spans over 3 meters. At 2.0mm, the same span stays rigid.
 
Watch for the alloy grade too. 6063-T5 is standard for architectural aluminum. It balances strength and corrosion resistance for outdoor use. Some manufacturers use lower-grade alloys to cut cost. The difference shows up after a few years of sun and rain.
 

Wind Load Rating

A louvered roof is a permanent structure. Wind rating matters more than most people think. In the US, the design wind speed for most regions ranges from 140 to 180 km/h for building codes. Your louvered roof should have a documented wind load calculation, not just a marketing claim.
When the louvers are open, wind passes through. When they are closed, the roof becomes a solid surface and takes full wind pressure. A good system is engineered for both states.
 

Motor and Control Specs

Torque (Nm).Determines how many louvers one motor can drive. 10 Nm is typical for a 4-bay setup.
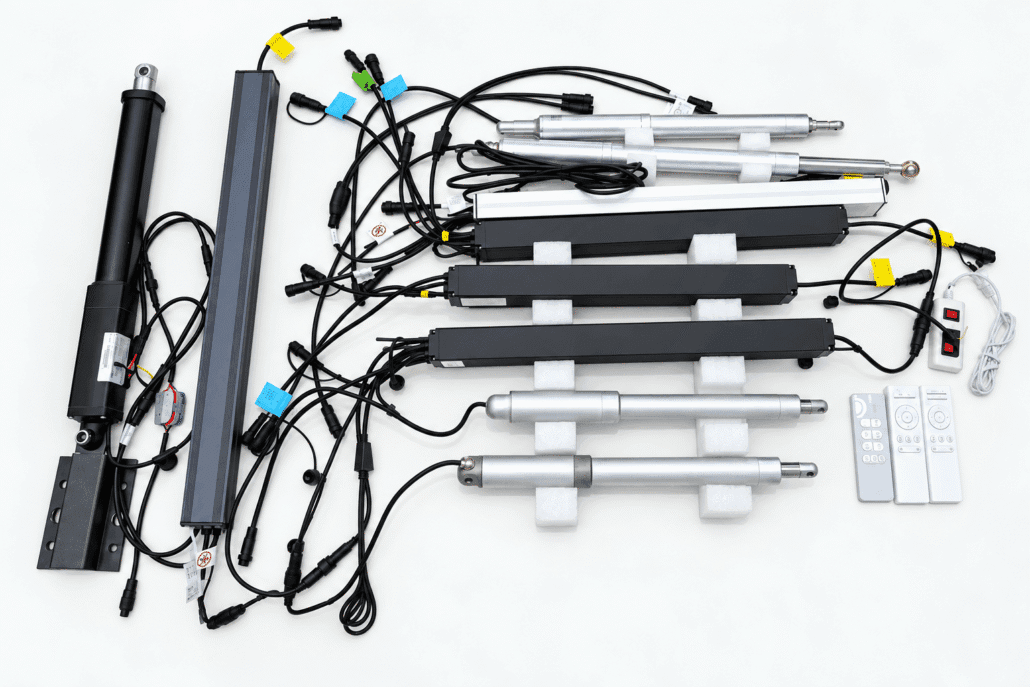
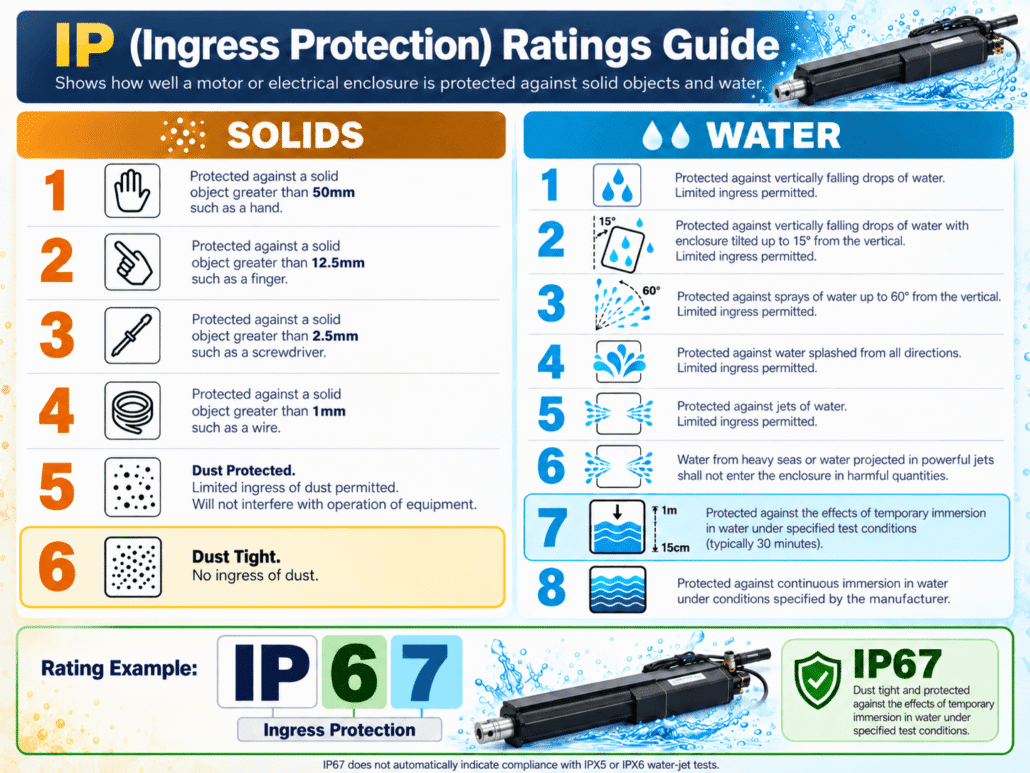
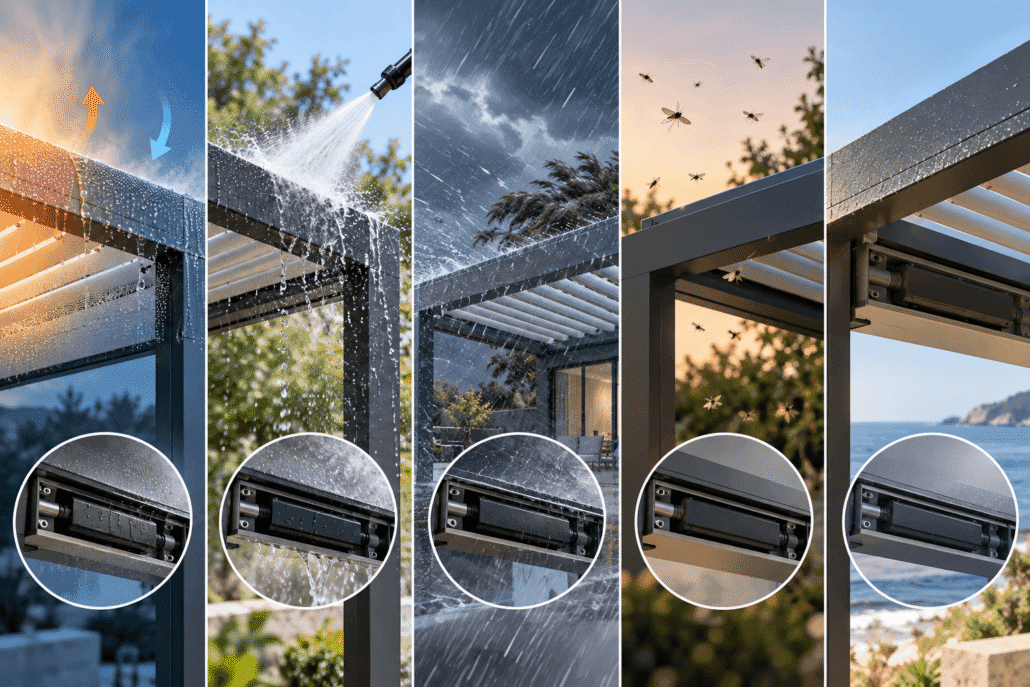
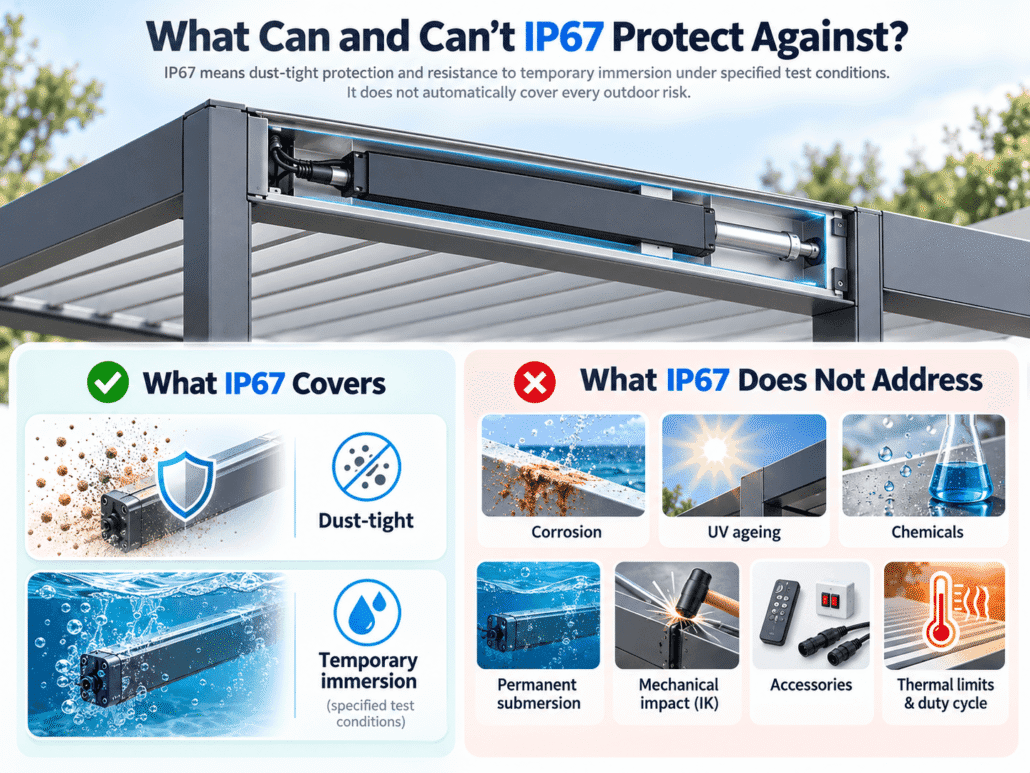
IP Rating.Outdoor motors should be at least IP44 (splash-proof). IP55 or IP67 is better.
Control Protocol. RF remotes are standard. WiFi bridges add phone control. Some systems offer dry-contact inputs for integrating with third-party home automation.
 

Color and Finish

Powder coating is the standard finish. Look for Qualicoat or AAMA 2604/2605 certification if you want the color to last 15+ years without chalking or fading. Dark colors absorb more heat. In hot climates, a light or medium tone keeps the underside cooler.

Planning a louvered roof project?
Send us your project dimensions, installation location and local wind requirements. Our team can recommend a suitable structural configuration.

Discuss Your Project

Where a Louvered Roof Fits?

A louvered roof is not just for houses. The same system works across different settings. What changes is the size, the mounting method, and the control setup.
 

 Residential Backyard

The most common use case. A 4×3 meter freestanding pergola over a patio or deck. The family uses the space for breakfast in summer and dinner with the louvers angled for sunset.
 

Restaurant and Café Patios

Restaurants need all-weather seating to maximize covers per year. A louvered roof turns a seasonal patio into a year-round dining area. When it rains, the system closes and drains. No scrambling to move tables inside. 
 

Hotel Pool Decks and Rooftop Bars

Loungers and cabanas need shade. Hotel guests will not sit in direct sun all afternoon. Fixed umbrellas cover two chairs each. The premium look also justifies premium pricing for cabana reservations.
 

Car Dealerships and Display Areas

Outdoor vehicle displays get punishing sun exposure. Paint fades. Interiors cook. A louvered roof over a display bay protects inventory and creates a more comfortable space for customers browsing on hot days.
 

Coverage Reference Table

 
SettingTypical SizeLouver ConfigurationPost Setup
Home Patio3m × 4mSingle bay2 posts + wall mount
Large Backyard5m × 4mDual bay4 freestanding posts
Restaurant Patio6m × 8mMulti-bay linked4–6 posts
Hotel Poolside8m × 5mMulti-bay linked6 posts

How to Choose the Right Louvered Roof for Your Space

Picking the right system comes down to three decisions. Most mistakes happen because people skip step one and go straight to comparing prices.

Step 1: Measure What You Actually Need

Do not guess. Go outside with a tape measure. Mark the area you want covered. Think about clearance. The underside of a louvered roof is typically 2.4 to 2.7 meters from the ground. If you want a ceiling fan or a heater mounted underneath, you need extra headroom.
Check the sun path. In the northern hemisphere, afternoon sun comes from the southwest. If your patio faces west, vertical louvers alone will not block low-angle late sun. You might need a side screen or vertical blinds on the west-facing side.
 

Step 2: Choose Your Motorization Level

Three tiers, from simple to fully automated:
Basic motor + remote. You press a button to open or close. No sensors. This is the entry point. Works fine if you are always home and do not mind manual control.
Motor + rain sensor + remote. The system closes itself when it rains. You still use a remote for everything else. This is the minimum for a “set and forget” experience.
Full smart system. Rain sensor, wind sensor, app control, scheduling, voice integration. The roof can open at sunrise and close at sunset automatically. You can check its status from your phone when you are on vacation. Higher upfront cost. Lower ongoing hassle.
 

Step 3: Verify the Structural Details

Before you pay a deposit, ask for these three things:
1. Wind load calculation for your postcode. Not a generic brochure number. An actual calculation based on your local wind zone.
2. Drainage path diagram.A drawing that shows how water flows from the louvers through the gutters to the ground. If they cannot produce this, walk away.
3. Warranty terms on the motor and the powder coating. Motors should have at least 5 years. Powder coating should have 10+ against peeling or chalking. Read the fine print. Some warranties are pro-rated after year 2.
 

Size Tier Quick-Pick

Small (2.5–3.5m span)Medium (3.5–5m span) ⭐Large (5m+ span)
Best for townhouse patios, small decksThe sweet spot for most homesCommercial patios, large entertaining areas
Single motor, 2–3 postsSingle or dual motor, 2–4 postsDual motor, 4+ posts, engineered structure
Lower cost, faster installBalanced price-to-space ratioRequires engineering, higher budget

Frequently Asked Questions About Louvered Roofs

Can a louvered roof handle heavy snow?
It depends on the amount of snowfall in your area. If you live in a heavy snow region, tell your supplier before ordering. The frame and louvers can be reinforced for snow loads, but this must be specified at the design stage. 
Does a louvered roof need planning permission?
It depends on where you live. In most US jurisdictions, a freestanding backyard pergola under a certain size (often 200 sq ft) does not need a permit. Wall-attached structures and larger spans usually do. Check with your local building department. A reputable installer should handle permits for you.
How much maintenance does a louvered roof need?
Very little. Once or twice a year, clean the louvers with soapy water and a soft brush to remove dust and bird droppings. Check the gutters for leaf buildup before rainy season. 
Can I add LED lights or heating later?
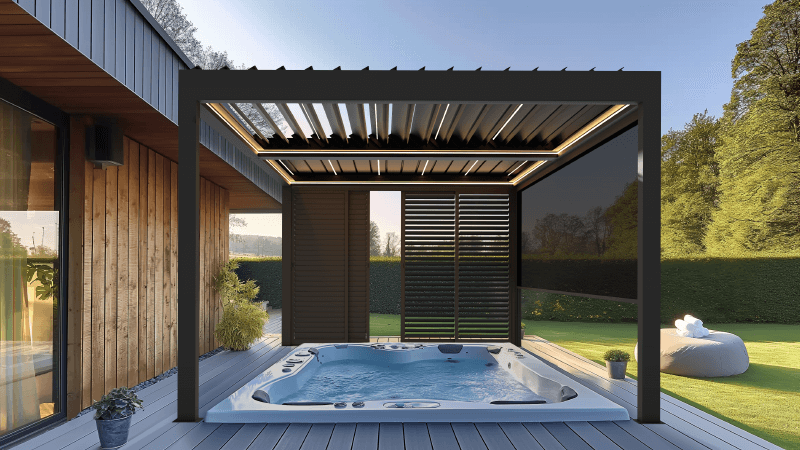
LED strips can be retrofitted into the louver channels on most systems. Infrared or electric heaters can be mounted to the frame beams. Both are easier and cheaper to install during the initial build. If you think you might want them, tell your installer before the frame goes up so they can run conduit for wiring.

OEM/ODM Solutions to Elevate Your Outdoor Brand Value

Ready to take your outdoor product line to the next level? Contact Greenawn. Let us help you elevate your brand with our bespoke solutions tailored for the outdoor industry.

Phone

+86 13622239259

Email

sale2@greenawn.com.cn, sale15@greenawn.com.cn

Find us Here

Building A, No. 13 Bangyan Road, Dalong Street, Panyu District, Guangzhou
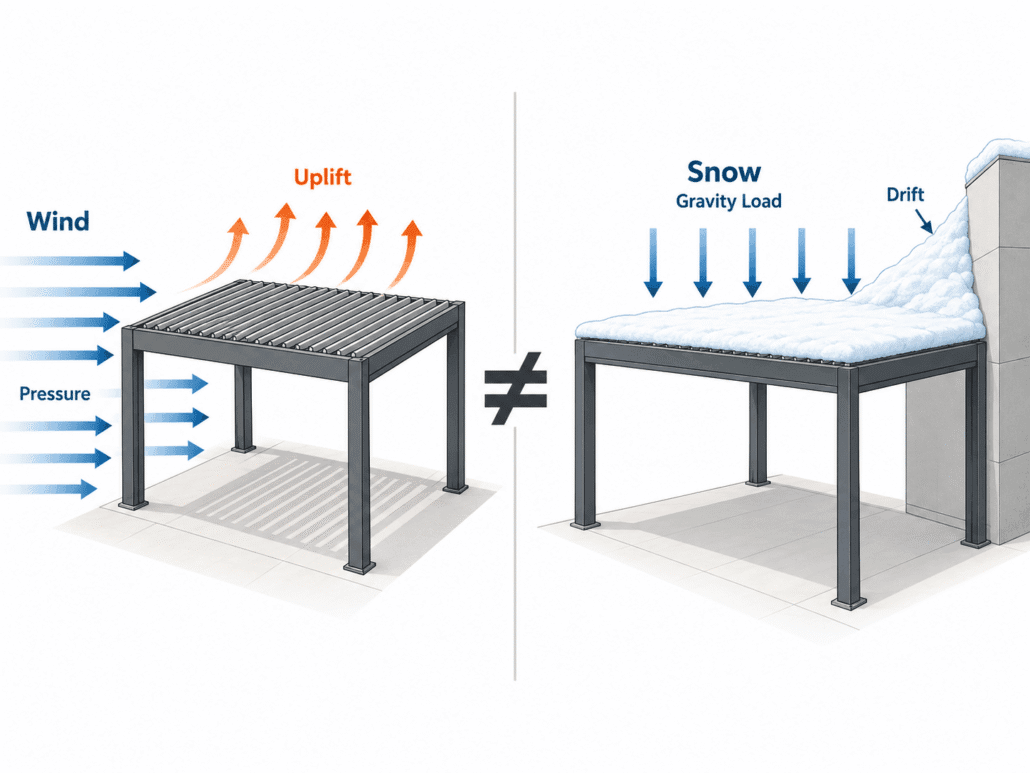
Table of Contents

What Size Pergola Do I Need? Standard Sizes and Measuring Guide

Creating the perfect outdoor space is an art, and choosing the right pergola size is crucial to enhancing its comfort. A pergola that is too small may make the furniture feel crowded, while an oversized structure can overwhelm the patio, block natural light, or take up valuable garden space.

So, what size pergola do you need?
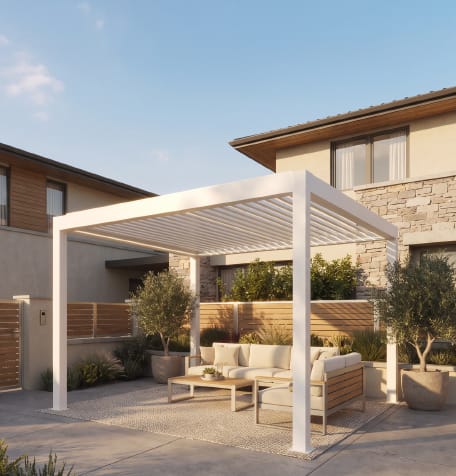
For many residential patios, a 10′ × 10′ or 10′ × 12′ pergola is a practical starting point. However, the ideal size depends on available installation area, the number of users, furniture placement, and how often the pergola is used.

This guide explains the average pergola size, common standard pergola sizes, how to measure pergola size correctly, and how to choose dimensions that fit your outdoor space.

Aluminum pergola installed over WPC decking terrace

What Is a Good Size for a Pergola?

A good pergola size should provide enough covered space for furniture and daily activities while leaving comfortable room for people to move around.

  • For a small seating area with two chairs and a side table, an 8′ × 8′ pergola may be sufficient.
  • A 10′ × 10′ or 10′ × 12′ model is generally more suitable for a typical residential patio.
  • Larger outdoor dining areas, lounge spaces, or poolside installations may require a 12′ × 16′ pergola or a custom structure.

The correct size should not be based only on the dimensions of the patio. It should also reflect how the space will be used after installation.

Available Space

The pergola must fit comfortably within the patio, garden, deck, or poolside area without blocking doors, windows, walkways, or drainage points.

Furniture Layout

The structure should be larger than the furniture footprint so chairs can be pulled out and people can move around without touching the posts.

Number of Users

A pergola designed for two people requires much less space than an outdoor dining area intended for six to ten guests.

Intended Function

Dining, lounging, outdoor cooking, commercial seating, and poolside relaxation all require different layouts and pergola dimensions.

What Is the Average Pergola Size?

The average pergola size for a residential property generally falls between 10′ × 10′ and 12′ × 16′. These dimensions are large enough to accommodate common patio furniture without taking over the entire backyard.

For outdoor dining, a 12′ × 12′ or 12′ × 16′ pergola is usually more comfortable because dining chairs require additional clearance when they are pulled away from the table.

There is no single average pergola size that works for every property. A narrow urban courtyard may need a compact attached pergola, while a hotel terrace or restaurant may require several connected pergola modules.

Common Standard Pergola Sizes

Pergola manufacturers often offer several standard dimensions because they suit common residential layouts and simplify transportation and installation.

Pergola SizeApproximate Metric SizeRecommended UseTypical Capacity
8' × 8'2.4 × 2.4 mSmall garden corner or compact seating areaTwo to four people
10' × 10'3 × 3 mSmall patio, hot tub, or lounge areaFour people
10' × 12'3 × 3.6 mResidential seating or compact dining areaFour to six people
12' × 12'3.6 × 3.6 mOutdoor dining or medium lounge areaSix people
12' × 16'3.6 × 4.8 mCombined dining and relaxation spaceSix to eight people
14' × 20'4.2 × 6 mLarge entertainment or commercial areaEight or more people

How to Size a Pergola for Different Uses

The best way to determine what size a pergola should be is to begin with its intended function.

🪑

Small Seating Area

8' × 8' to 10' × 10'

Suitable for two lounge chairs, a loveseat, or a small café table in a compact patio, courtyard, or garden corner.

🍽️

Outdoor Dining Area

10' × 10' to 14' × 18'

Allow enough space for the dining table, fully extended chairs, and comfortable movement around the seating area.

🛋️

Outdoor Living Room

10' × 12' to 12' × 16'

A larger footprint provides room for sofas, lounge chairs, coffee tables, lighting, and other outdoor living features.

🏊

Poolside Area

10' × 12' to 12' × 20'

Plan sufficient space for sun loungers, side tables, and safe walking routes around the pool.

🔥

Outdoor Kitchen

Custom Size Recommended

Measure grills, cabinets, counters, and work areas carefully while allowing room for ventilation and circulation.

How to Measure Pergola Size Correctly

Learning how to measure pergola size before requesting a quotation can prevent installation problems and unexpected modifications.

Measure the Available Width and Projection

Measure the full installation area and record the smallest usable dimensions instead of assuming that the patio, wall, or deck is perfectly square.

Identify Fixed Obstacles

Mark the position of doors, windows, roof overhangs, drains, downpipes, fences, trees, lights, air-conditioning units, and utility connections.

Map the Furniture Footprint

Place the intended furniture in the area or mark its outline with masking tape to understand how much usable space it will require.

Check Walking and Circulation Space

Walk around the marked layout and make sure chairs, doors, and pathways can be used comfortably without colliding with pergola posts.

Confirm How Pergola Dimensions Are Defined

Ask whether the listed size refers to the overall roof dimensions, the external post-to-post measurement, or the clear distance between posts.

Review the Technical Drawing

Compare the final measurements with the manufacturer’s drawing before ordering, because roof size, post spacing, and usable internal space may not be identical.

MeasurementWhat to CheckWhy It Matters
Overall AreaMeasure the total available width and projection.Confirms the maximum structure size that the space can accommodate.
Furniture FootprintMeasure furniture with chairs, doors, or drawers fully extended.Prevents furniture from colliding with posts or blocking walkways.
Post PositionConfirm the distance between posts and their foundation points.Ensures the supporting structure fits the patio, deck, or concrete base.
Roof CoverageCheck the overall roof dimensions and any beam overhang.Determines the actual amount of shade and weather protection.
Vertical ClearanceMeasure doors, windows, eaves, and surrounding rooflines.Prevents interference with existing building elements.
Drainage AreaLocate drains, downpipes, and natural water-flow paths.Helps avoid water accumulation around posts and foundations.

How Much Space Should You Leave Around a Pergola?

How Much Space Should You Leave Around a Pergola?

Leaving extra usable space at the beginning is usually easier than expanding the pergola later. Dining chairs should be able to move backward without hitting a post. Sliding or folding doors should open fully without entering the structural area.

Remember onsider future changes. A patio that currently contains only a table may later include a barbecue, storage cabinet, heater, side screens, or outdoor sofa.

Last, local planning, setback, and permit requirements can vary. Before finalizing the dimensions, check the relevant rules for the project location and confirm any required distances from boundaries or neighboring structures.

Attached vs. Freestanding Pergola Size

The installation type can influence how to size a pergola.

Neither option is automatically better. The correct choice depends on the building structure, available installation area, and intended use.

Attached Pergola

An attached pergola connects directly to an exterior wall and usually extends over a patio next to the house.

Its width may be influenced by the wall length, door positions, windows, eaves, and the strength of the mounting surface.

Best for patios directly connected to the house.

Freestanding Pergola

A freestanding pergola is supported by its own posts and can be installed in a garden, beside a pool, or over an independent seating area.

It offers greater flexibility in positioning, but the post foundations and surrounding clearance must be planned carefully.

Best for flexible garden and commercial layouts.

Standard Pergola Size vs. Custom Pergola Size

A standard pergola size is suitable when the patio has common dimensions and the furniture layout is relatively simple. Standard models may also reduce design and manufacturing time.

However, not every outdoor space follows standard measurements.

A custom pergola may be more appropriate for narrow courtyards, irregular patios, large commercial spaces, outdoor kitchens, hotel terraces, and multi-zone entertainment areas.

Common Pergola Sizing Mistakes

  • Sizing only around the furniture: Leave extra room for walking, chair movement, posts, gutters, and future accessories.
  • Confusing roof size with usable space: Overall dimensions may be larger than the clear distance between the posts.
  • Leaving no installation clearance: Allow space for drainage, cleaning, maintenance, and access.
  • Ignoring pergola height: A pergola that is too tall may provide less shade, while one that is too low can interfere with doors, lighting, and airflow.

What Size Should a Pergola Be for Your Project?

The right pergola size should balance usable space, furniture placement, visual proportion, weather protection, and installation requirements. The following recommendations provide a practical starting point for different project types.

Project TypeRecommended SizeSuitable ApplicationKey Consideration
Compact Seating Area8′ × 8′Small courtyard, balcony, or garden cornerAllow enough clearance around chairs and pergola posts.
Residential Patio10′ × 10′ to 10′ × 12′Small lounge, hot tub, or four-person seating areaConfirm whether the listed size refers to the roof or post spacing.
Dining or Lounge Area12′ × 12′ to 12′ × 16′Outdoor dining, sofa seating, or mixed-use patioInclude space for chair movement and comfortable circulation.
Large Residential Project12′ × 20′ or custom sizePoolside areas, outdoor kitchens, and multi-zone spacesPlan around fixed obstacles, drainage, and accessories.
Commercial ProjectCustom or modular systemHotels, restaurants, retail spaces, and hospitality projectsConsider site conditions, local standards, capacity, and future expansion.

Before ordering, measure the installation area, prepare a furniture layout, identify fixed obstacles, and review the manufacturer’s technical drawings.

Greenawn supplies standard and customized aluminum pergola systems for residential, hospitality, retail, and commercial applications. Dimensions, configurations, accessories, and finishes can be developed according to project requirements and local market needs.

Frequently Asked Questions

What is the most common pergola size?

A 10′ × 10′ or 10′ × 12′ pergola is common for residential patios. These sizes can accommodate a small lounge or dining arrangement while fitting into many typical backyard layouts.

Is a 10 × 10 pergola big enough?

A 10′ × 10′ pergola is generally large enough for four chairs, a small outdoor sofa, a compact dining table, or a hot tub. It may feel limited if you want to combine dining, cooking, and lounge furniture in one area.

How big should a pergola be for a six-person table?

A 12′ × 12′ pergola is a practical starting point for many six-person dining tables. A 12′ × 16′ structure offers more comfortable circulation space and additional room for serving furniture or accessories.

Should a pergola be larger than the patio furniture?

Yes. The pergola should normally extend beyond the furniture footprint. This provides room for chair movement, walking, posts, and more consistent shade or weather protection.

How are pergola dimensions measured?

Pergola dimensions may refer to the overall roof size, the external post dimensions, or the clear distance between posts. Always check the manufacturer’s drawings to confirm which measurement is being used.

Can I order a custom pergola size?

Yes. Custom pergola dimensions are often available for irregular patios, commercial projects, large entertainment areas, and installations requiring special post positions, heights, colors, or accessories.

Conclusion

Whether for residential courtyards, hotel terraces, dining spaces, or large commercial outdoor projects, Greenawn offers suitable aluminum pergola solutions tailored to site dimensions, functional requirements, and local market standards. With 29 years of manufacturing experience, we support standard product supply, customized sizes, OEM/ODM development, and project support services, helping distributors, contractors, and project owners improve delivery efficiency and market competitiveness. Contact us for  technical solutions, and project quotations!

OEM/ODM Solutions to Elevate Your Outdoor Brand Value

Ready to take your outdoor product line to the next level? Contact Greenawn. Let us help you elevate your brand with our bespoke solutions tailored for the outdoor industry.

Phone

+86 13622239259

Email

sale2@greenawn.com.cn, sale15@greenawn.com.cn

Find us Here

Building A, No. 13 Bangyan Road, Dalong Street, Panyu District, Guangzhou