
How to build a pergola carport? A Complete Guide for B2B Buyers
May 21, 2026
Outdoor living products continue to grow in global markets. More dealers now sell pergola systems and outdoor structures. Many building material companies also want to expand their product lines.
Among these products, pergola carports are particularly popular. Compared to traditional garages, pergola carports have a cleaner look and are quicker to install.
And among the many materials available, Aluminum pergola carports also offer better corrosion resistance and lower maintenance costs than steel or wood-framed carports.
This guide explains how to build a pergola carport step by step. It also covers materials, structure planning, installation, and OEM manufacturing support.

What Is a Pergola Carport?
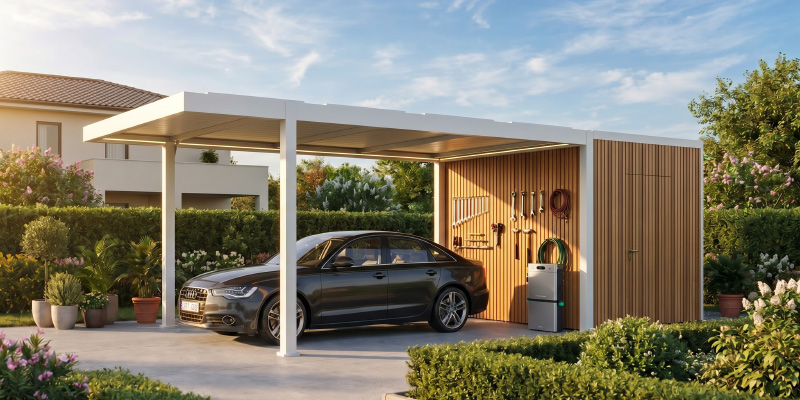
A pergola carport is a modern outdoor parking structure designed to protect vehicles while improving outdoor appearance.
Unlike traditional carports, pergola carports focus on both function and design. Many modern systems use aluminum frames, waterproof roofs, and integrated drainage systems.
Some models also include motorized louvers, LED lighting, and side screens for additional comfort and functionality.
Common Applications
| Application Type | Common Usage | Key Benefits |
|---|---|---|
| Residential Parking Areas | Homeowners install pergola carports in driveways or backyards. | Protects vehicles while improving outdoor appearance. |
| Commercial Parking Spaces | Office buildings and retail centers use pergola parking structures. | Enhances project value and modernizes commercial spaces. |
| Hotels and Resorts | Luxury hotels place pergola carports near entrances and outdoor areas. | Creates a premium guest experience and functional parking area. |
| Outdoor Retail Projects | Restaurants and outdoor stores use custom pergola carports. | Supports multi-functional outdoor business spaces. |
Make sure you remember: Get Plans and Permits
Determine the Installation Location
When planning, your space should ideally be large enough to support ample parking and convenient drainage. If for a commercial project, allow sufficient turning space to prevent traffic congestion.
Understand Local Building Requirements
Building standards vary from region to region. Always obtain drawings and permits from the relevant authorities. This will ensure that the building complies with local government and building code requirements.
Pergola Carport Permit Requirements (General Rules)
| Structure Type | Permit Requirement | Notes |
|---|---|---|
| Permanent / Fixed Structures | Usually Required | Includes concrete foundation, attached structures, and large-span pergolas under IRC and EU guidelines. |
| Small / Freestanding Modular Pergolas | Often Not Required (varies by region) | Typically treated as temporary or decorative outdoor structures if size and impact are limited. |
| Advanced Systems (Motorized, Electrical, Drainage) | Usually Required | Electrical components, motorized louvers, and drainage integration often trigger inspection requirements. |
| Commercial Projects | Almost Always Required | Hotels, retail spaces, and parking projects require permits, engineering drawings, and compliance checks. |
Note: Permit requirements vary by country and municipality. Always confirm with local building authorities before installation.
Choose the Right Pergola Carport Size
Will you use this carport for home or business purposes? Having two cars but only a single-space carport is awkward. If it’s a commercial project, dealers need to customize the size based on daily traffic volume to meet customer needs.
Evaluate Climate Conditions
What’s the weather like where you are? Weather conditions directly impact the choice of carport materials.
Areas with strong winds require reinforced structures to withstand the wind. Areas with heavy rain need efficient drainage systems. If you’re coastal, you’ll need corrosion-resistant materials. Don’t forget, UV radiation not only affects your skin but also the long-term appearance of the materials!
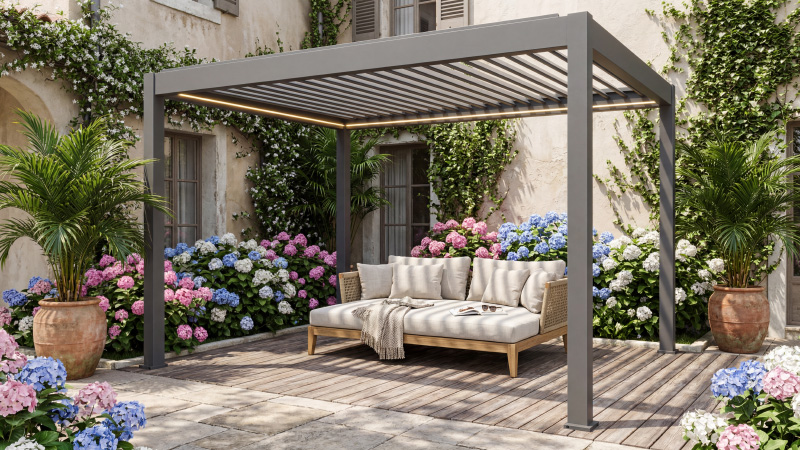
Main Components of a Pergola Carport
After receiving the shipment, carefully inspect all pergola components. Most systems include the following parts.
Posts and Beams
Posts and beams provide structural stability.
Aluminum systems usually use powder-coated profiles. Thickness depends on project size and wind load.
Strong beam connections improve long-term durability.
Roof System Options
Different roof systems support different project needs.
Louvered Roof
Provides adjustable sunlight and ventilation.
Polycarbonate Roof
Offers lightweight weather protection.
Insulated Panels
Improve thermal performance in hot climates.
Waterproof Roof Systems
Suitable for heavy rain regions and commercial applications.
Drainage System
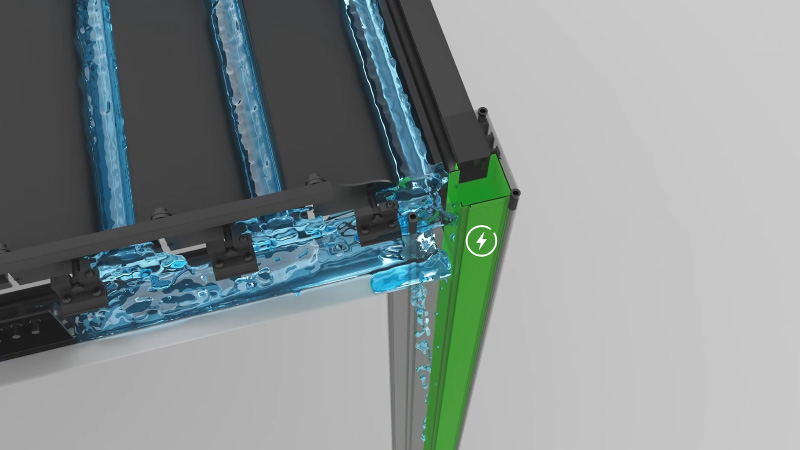
Modern pergola carports often use hidden gutter systems. Internal drainage improves appearance and water management.
Poor drainage design may reduce product lifespan.
Anchoring and Foundation
Most pergola carports require concrete foundations.
Ground mounting systems improve structural stability. Proper anchoring is critical for commercial projects.
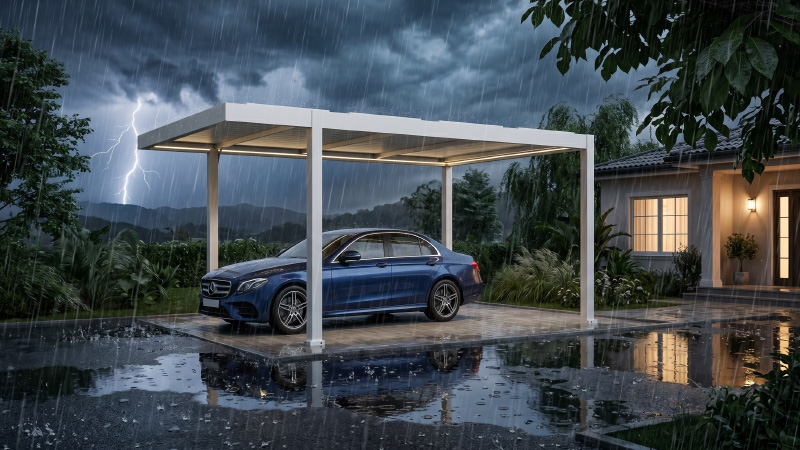
Step-by-Step Guide: How to Build a Pergola Carport
Step 1: Prepare the Site
Level the ground before installation.Ensure your ground is level.
Reserve enough space around the pergola carport. Commercial projects should leave extra vehicle movement space.
Mark the installation dimensions carefully. Then prepare the concrete foundation.
Step 2: Install the Posts
Position all posts according to the engineering drawing.
Secure the posts using anchor bolts. Check alignment before tightening connections.
Correct positioning improves structural safety.
Step 3: Assemble the Beam Structure
Install beams based on the installation sequence.
Check load-bearing connections carefully. Use proper fastening methods for long-term stability.
Step 4: Install the Roof Panels or Louvers
Install roof systems after the frame assembly.
Make sure all waterproof joints are sealed correctly. Louver systems also require motor testing and ventilation checks.
Step 5: Add Drainage and Accessories
Install hidden gutters and drainage pipes.
Many modern pergola carports also include:
- LED lighting
- Side screens
- Sliding glass doors
- Motorized systems
These accessories increase commercial value.
Step 6: Final Inspection and Testing
Inspect the full structure after installation.
Check:
- Structural stability
- Drainage performance
- Roof waterproofing
- Surface finishing
Final testing helps reduce future maintenance problems.
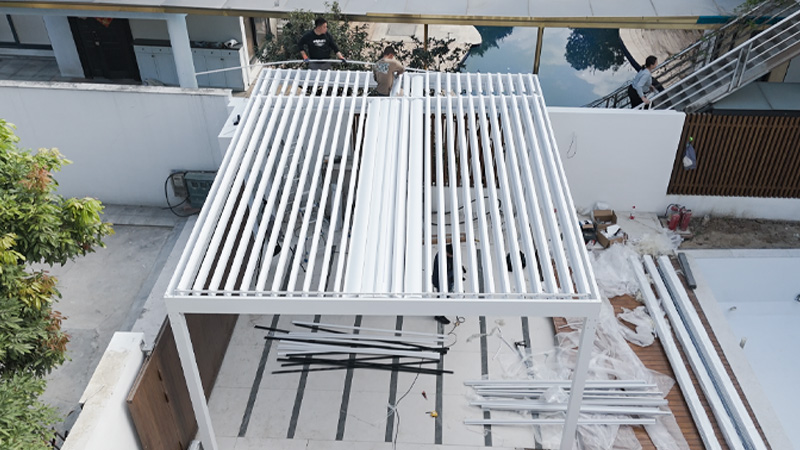
Common Challenges When Building a Pergola Carport
Structural Stability Issues
Weak foundations may affect long-term safety.
Always confirm wind load calculations before installation.
Waterproofing Problems
Incorrect sealing may cause leakage problems.
Professional waterproof systems improve outdoor performance.
Poor Drainage Design
Blocked drainage systems may create standing water.
Hidden gutter systems should remain accessible for maintenance.
Incorrect Material Selection
Wood requires regular maintenance. Steel may corrode in coastal environments.
Aluminum pergola carports usually provide better durability.
Installation Efficiency for Commercial Projects
Large projects require efficient installation systems.
Prefabricated aluminum structures reduce labor time and project costs.
How Long Does It Take to Build a Pergola Carport?
Factors Affecting Installation Time
Installation time depends on:
- Project size
- Material type
- Weather conditions
- Foundation preparation
Small residential projects may finish within several days. Large commercial projects require longer schedules.
Prefabricated Aluminum Systems vs Traditional Construction
Prefabricated aluminum pergola systems install faster than traditional structures.
They reduce labor costs and simplify transportation. Dealers also benefit from better project scalability.
Recently Pergola Carport Design Ideas for Dealers and Contractors
Modern Minimalist Designs
Minimalist aluminum structures remain highly popular in global markets.
Dark colors and clean lines fit modern architecture.
Luxury Residential Carports
Luxury projects often include:
- LED lighting
- Sliding glass systems
- Motorized louvers
- Smart controls
Commercial Outdoor Parking Solutions
Commercial pergola parking structures improve outdoor branding and customer experience.
Many outdoor projects now prefer custom pergola carports.
Integrated Solar Pergola Carports
Solar pergola systems continue to grow in demand.
They combine parking protection with renewable energy solutions, aligning with current low-carbon and environmentally friendly principles.
OEM & ODM Pergola Carport Manufacturing Solutions
Why Dealers Are Expanding Into Pergola Carports
Outdoor living markets continue to expand globally.
Pergola carports offer higher product value and strong market demand.
What to Look for in a Pergola Manufacturer
Choose a pergola carport manufacturer with:
- Sufficient production capacity: ensures timely bulk order delivery.
- Strict quality control: maintains consistent product performance.
- Rich export experience: helps avoid cross-border trade risks.
- Professional engineering support: solves on-site installation and design problems.
A reliable supplier improves project efficiency.
Customization Options
Professional pergola OEM manufacturers usually provide:
- Custom sizes to match various site spaces and usage demands.
- Powder coating colors to fit different architectural styles and market tastes.
- Roof system options to suit different weather and functional needs.
- OEM branding support to print exclusive logos and brand marks on products.
Benefits of Working With an Experienced Factory
Experienced factories provide:
- Stable supply chains
- Faster lead times
- Technical support
- Better container loading solutions
For dealers, this improves long-term business development.
FAQ
Is a pergola carport waterproof?
Many modern pergola carports include waterproof roof systems and hidden drainage designs.
What is the best material for a pergola carport?
Aluminum is one of the best materials because it is durable and corrosion-resistant.
How long does an aluminum pergola carport last?
High-quality aluminum pergola systems can last for decades with proper maintenance.
Can pergola carports withstand strong wind?
Yes. Engineering design and proper anchoring improve wind resistance.
Are pergola carports suitable for commercial use?
Yes. Many hotels, retail projects, and office buildings use pergola parking structures.
How large should a pergola carport be for two cars?
Double-car projects require wider beam spacing and larger foundations.
Do pergola carports require permits?
Most regions require permits before installation.
Can dealers customize pergola carports with OEM branding?
Yes. Many pergola OEM manufacturers support branding and custom designs.
Conclusion
The pergola carport market continues to grow worldwide. Dealers and contractors now seek modern outdoor parking solutions.
Compared with traditional structures, aluminum pergola carports offer better durability and appearance. They also provide faster installation and lower maintenance costs.
For distributors and outdoor building companies, custom pergola carports create strong business opportunities.
As an experienced aluminum pergola factory, Greenawn supports OEM and ODM projects for global partners. We provide customized solutions, stable production, and technical support for commercial outdoor projects.
10 Benefits of a Pergola
blogAluminum Pergola Installation: Complete Step-by-Step Guide
blogTable of Contents
Aluminum Pergola Installation: Complete Step-by-Step Guide
Still struggling with aluminum pergola installation? This ultimate pergola installation guide covers everything from pre-installation planning to daily upkeep, making your outdoor pergola installation smooth, efficient, and hassle-free.
Whether you’re a DIY enthusiast aiming for self-installation or a business seeking reliable custom pergola installation services, we’ve packed this guide with actionable pergola installation tips and step-by-step instructions. Let’s get started!
Pre-Installation: Design & Planning Phase
1.Start with On-Site Assessment
Before diving into installing your pergola, the first step is to analyze your outdoor space. Our designers evaluate factors such as area size, height restrictions, sun exposure angles, and surrounding landscapes to avoid mismatches between the pergola and your site—which could lead to costly rework.
2. Material Selection & Craftsmanship
3. Great Design = Successful Pergola Installation
Next, design your pergola style. Professional design teams consider multiple dimensions to ensure the pergola is both aesthetically pleasing and functional. After communicating your needs, engineers use 3D modeling and CAD drawings to simulate visual effects and structural layouts. We also offer a dedicated app for design simulation, helping you make the best choice for your aluminum pergola installation.
4. Do I Need Custom Pergola Installation Services?
Basic DIY kits may limit style, function, and future upgrades. To get the most out of your aluminum pergola installation, list your use cases (dining, reading, outdoor office) to determine if custom pergola installation services or additional features are needed.
We highly recommend pre-burying electrical and drainage systems during pre-installation—this avoids rework later and supports seamless aluminum pergola installation.
By following these steps, you’ll initially design a solution that balances aesthetics and functionality for your outdoor pergola installation!
Pre-Installation Preparation: Lay a Solid Foundation
1. Can I Install the Aluminum Pergola Myself?
2. Tools Needed for Aluminum Pergola Installation
Before starting construction, prepare all necessary tools and materials to ensure a smooth aluminum pergola installation process. We generally recommend the following tools:
Tools Recommendations & Uses
Essential and optional tools for a smooth aluminum pergola installation. Prepare these before starting to ensure efficiency and safety.
Install beams, louvers, and roof components at height.
Assemble, position, or fit aluminum profiles gently without damaging the surface.
5m+ steel tape for measuring foundation size and module spacing accurately.
Tighten bolts and nuts; adjustable wrenches fit all connectors.
Mark positioning points on aluminum modules or foundations for precise alignment.
2m laser level for calibrating post and beam verticality and horizontal alignment.
Drill holes in foundations or aluminum modules for anchoring and assembly.
Prevent scratches and cuts from sharp aluminum edges during handling.
Protect eyes from metal shavings and debris while drilling or cutting.
3. On-Site Survey & Data Collection for Precision Aluminum Pergola Installation
Core Data to Confirm:
Environmental Factor Evaluation:
4. Compliance & Permit Confirmation
Step-by-Step Aluminum Pergola Installation Process
Now, let’s move to the most anticipated installation phase! We’ve simplified the process into six steps, applicable to most modular aluminum pergolas:
Step 1. Prepare a Solid Foundation
Step 2. Install the Posts
Step 3. Assemble the Beams
Step 4. Fit the Top Brackets
Step 5. Install the Cover / Roof Panels
Step 6. Louver & Accessory Installation
Step 1. Prepare a Solid Foundation
Everything starts with the base. Confirm the ground is level, load-bearing, and cured (for concrete slabs, allow full curing before drilling). Set out the column positions with a chalk line and measuring tape, strictly following the approved shop drawings, and double-check diagonals to make sure the layout is square.
This is also the stage to pre-bury your electrical conduits and drainage pipes. Skipping it here means opening up the ground later — and it directly affects how cleanly the wiring connects and how well the structure drains.
Step 2. Install the Posts
Place a base plate at each marked position, then fasten it to the foundation with expansion or chemical anchor bolts using a hex wrench or impact drill. Stand each post, check it with a spirit level on two adjacent faces, and shim as needed before final tightening.
Plumb posts are the single biggest factor in a stable pergola — a 1–2 mm lean at the base becomes a visible gap at the roof.
Step 3. Assemble the Beams
Our beams arrive prefabricated, so no on-site cutting is required — simply lift them into position and bolt them to the post connectors. This cuts installation time and eliminates measurement errors on site.
For spans over 6 m, add auxiliary support beams or an intermediate post to prevent long-term deflection.
Step 4. Fit the Top Brackets
Align the top brackets with the pre-drilled holes on the beams, insert the bolts, and tighten evenly in a cross pattern rather than one side at a time. Recheck level across the whole frame before final torque — the brackets carry the roof load, so any misalignment here shows up in the finished structure.
Step 5. Install the Cover / Roof Panels
Lay the roof panels or louver frame onto the brackets, working from one end to the other so each panel seats fully before the next goes on. Fit the sealing strips and gutter connections, then run a simple water test: pour water along the roof and confirm it drains through the integrated gutters and downpipes with no pooling or leakage at the joints.
Step 6. Louver & Accessory Installation
Louvers: Mount the louver shafts and motor, run the blades through a full cycle to confirm smooth rotation, then calibrate the 0°–90° range using the limit switches.
Accessories:
LED lighting — wire according to the circuit diagram and seal every connection with waterproof connectors.
Sun / wind screens — install the side rails first, fix the screen, then test raising and lowering several times to confirm smooth travel.
Inspection & Acceptance to guarantee Installation Quality
Inspection and acceptance are crucial for any aluminum pergola installation project. They not only ensure quality and safety but also help avoid future issues and reduce rework risks. We divide this process into two phases: pre-shipment factory inspection and on-site self-inspection during installation.
Pre-Shipping Factory Inspection
Before shipping, we verify product completion and 80%+ packaging progress. Samples undergo rigorous checks (appearance, size, accessories, labels, packaging) to ensure compliance with aluminum pergola installation standards. Key aluminum components (connectors, welds, rust-proof coating) are inspected for defects. Functionality tests confirm “ready-to-install” status, and we provide material certificates. Only after approval do we ship, minimizing logistics and return risks.
On-Site Self-Inspection During Installation
To ensure standardized aluminum pergola installation, we’ve compiled a key checklist for installers:
Aluminum Pergola Maintenance Tips
Aluminum pergolas have low maintenance needs, but these pergola installation tips will extend their lifespan by ~40%:
Conclusion
With 29 years of OEM experience and aluminum pergola installation practices in 120+ countries, Greenawn is trusted by thousands of contractors and developers worldwide.
Whether you’re expanding commercial outdoor seating or upgrading a residential patio, our modular aluminum pergolas offer easy installation—even if you lack time, tools, or expertise. Our solutions combine cutting-edge design, premium materials, and smart technology for year-round durability.
We empower B2B partners with:
Need custom pergola installation services or project collaboration? Contact Greenawn today for tailored aluminum pergola installation solutions!
You may also interested...
Louvered Pergola vs Fixed Roof: Which Is Better?
Can a Pergola Be Moved? A Complete Relocation Guide
Best Pergola Material: Vinyl, Wood, or Aluminum?
Pergola Vs. Trellis: What’s The Difference? | Greenawn
Best Roofing Options for Outdoor Kitchen Pergolas: Solid Roof vs Adjustable Louvers
Pergola vs. Gazebo: Which Shade Structure Is Right for Your Outdoor Kitchen?
OEM/ODM Solutions to Elevate Your Outdoor Brand Value
Ready to take your outdoor product line to the next level? Contact Greenawn. Let us help you elevate your brand with our bespoke solutions tailored for the outdoor industry.
Phone
+86 13622239259
Email
sale2@greenawn.com.cn, sale15@greenawn.com.cn
Find us Here
Building A, No. 13 Bangyan Road, Dalong Street, Panyu District, Guangzhou
How Tall Should a Patio Pergola Be? Typical and Special Considerations
blogTable of Contents
How Tall Should a Pergola Be? Standard Heights and Sizing Guide
Quick Answer
Most pergolas should be 8 to 12 feet tall, with 9 to 10 feet being the ideal height for most residential patios.
An 8-foot pergola works well for compact spaces, while a 10-foot pergola provides better airflow and overhead clearance. Heights of 11 to 12 feet are generally more suitable for large patios, outdoor kitchens, commercial spaces, or sloped roof designs.
The evening sun casts a warm glow across the patio. A family gathers beneath a sleek aluminum pergola—soft music plays, dinner is served, and the open yet sheltered space feels just right. The roof offers shade without blocking the breeze, the lights hang at a comfortable height, and every proportion seems effortlessly balanced. It’s not by accident—it’s the result of choosing the right pergola height.
The height of a patio pergola directly affects the shade, airflow, visual balance, and overall usability of your outdoor space. Choosing the right height can make your pergola feel inviting and spacious, while a miscalculated one can make it feel cramped or out of proportion with your home’s architecture.
Understand the Standard Pergola Height Basics
How Tall Should a Patio Pergola Be Typically?
Most outdoor patio with pergolas fall within a standard height range of 8 to 12 feet (about 2.4 m to 3.7 m). This range offers a balanced mix of comfort, functionality, and aesthetics.
Attached vs. Freestanding: How Attachment to a House Wall Influences Ideal Height?
The type of pergola, whether attached to the house or freestanding, also affects your choice of height.
When attaching to a house, you must coordinate with existing building features, including windows, eaves, gutters, siding, and rooflines. You don’t want pergola beams or rafters to block a window view or interfere with gutters.
The attachment point (ledger) often constrains the height: many designs align the pergola top or beam line just below or slightly above the house’s eaves, so it feels like a natural extension.
Due to these constraints, attached pergolas in patio areas often fall on the lower end of the standard range (e.g., 8 to 10 feet) to maintain harmony with the existing architecture.
A freestanding pergola offers much more flexibility because it doesn’t need to align with an existing wall. You can choose a height that best balances visual scale, airflow, and usability. Because gutters or roof overhangs do not constrain you, you have more freedom to design the height you want and accommodate features like ceiling fans, pendants, taller drapery, or climbing plants. That said, going extremely tall without context may make the pergola feel disconnected from its surroundings or diminish its shade-effectiveness (depending on sun angles).
Here’s a chart to make it clearer to understand the differences between pergola in freestanding vs attaching:
Roof Type: Flat vs. Pitched or Louvered Roofs
The type of roof you choose also determines how much extra height on the patio pergola or clearance space you’ll need to accommodate its structure.
Special Scenarios That Require Height Adjustments for Safety and Balance
Proportion to Patio Space
Don’t forget: When installing a patio pergola, consider how it will interact with the home’s surroundings, including eaves, outdoor lighting, nearby trees, and balcony edges. The goal is to leave enough room for both visual balance and functional clearance, so the structure doesn’t feel squeezed or obstructed. So, you’d better understand the exact height of your patio pergola.
Special Scenarios That Require Height Adjustments for Safety and Balance
In some situations, safety, ventilation, or architectural alignment demand customized height adjustments, which would be out of the standard we mentioned above.
1. Outdoor Kitchens or Fire Features
When you’re placing a grill, fire pit, fireplace, or other combustion-based amenities under or near the pergola, heat and smoke clearance become critical because of its rising nature. So, a too-low roof can trap heat, damage materials, or pose fire hazards.
2.Two-Story Homes
If your pergola is attached or located adjacent to a multi-story structure, its height must harmonize with upper windows, balconies, rooflines, and the overall facade.
Height alignment factors:
3. Sloped Terrain
When your patio or yard is on uneven ground or a slope, using uniform post lengths alone will result in a crooked pergola. To maintain a level roofline and pleasing visual continuity, adjustments are necessary.
A Smart Pergola for Patio: Greenawn’s TO-981
So, how tall should a patio pergola be? As mentioned above, a standard patio pergola is around 8-12 feet tall. Yet, there are some considerations to make some changes according to the specific patio design ideas.
Greenawn’s TO-981 is an aluminum pergola that is designed for professional suppliers and installers who need versatility, durability, and a premium look to satisfy different customer demands. It’s built for performance and flexibility—the height can be customized to suit varying installation environments and architectural styles, ensuring perfect integration in every project.
Here are more details below:
Multiple Installation Options: The TO-981 supports wall-mounted, freestanding, and wall-hanging setups and up to 5 different styles, making it adaptable for patios, rooftops, gardens, and other commercial outdoor spaces. This flexibility allows you to tailor solutions for different customer layouts.
Hollow Shuttle Louver System: Featuring a 120° swivel design, this system provides superior top shading and ventilation control for your outdoor patio with a pergola. Its 100% waterproof structure ensures all-weather reliability, helping customers seek comfort and convenience.
Hidden Drainage System: Engineered with sealed, built-in drainage channels, this patio pergola can effectively manage rainwater without exposing pipes or compromising design integrity. This hidden system enhances both durability and aesthetics—an advantage that appeals to discerning buyers.
Waterproof LED Lighting System: The integrated low-power LED lights create a refined ambiance for nighttime use. Fully waterproof and energy-efficient, they highlight the pergola’s craftsmanship while offering long-term reliability.
Want to explore tailored configurations and bring superior pergola solutions to your market? Contact Greenawn today!
You may also interested...
Louvered Pergola vs Fixed Roof: Which Is Better?
Can a Pergola Be Moved? A Complete Relocation Guide
Best Pergola Material: Vinyl, Wood, or Aluminum?
Pergola Vs. Trellis: What’s The Difference? | Greenawn
Best Roofing Options for Outdoor Kitchen Pergolas: Solid Roof vs Adjustable Louvers
Pergola vs. Gazebo: Which Shade Structure Is Right for Your Outdoor Kitchen?
OEM/ODM Solutions to Elevate Your Outdoor Brand Value
Ready to take your outdoor product line to the next level? Contact Greenawn. Let us help you elevate your brand with our bespoke solutions tailored for the outdoor industry.
Phone
+86 13622239259
Email
sale2@greenawn.com.cn, sale15@greenawn.com.cn
Find us Here
Building A, No. 13 Bangyan Road, Dalong Street, Panyu District, Guangzhou